TL;DR
Talo makes it easy to save and load game data in your Godot game. In this tutorial, you'll build a simple project that shows creating a save, updating a save and loading a save.
A simple but robust game save system
Building a save system is something most game developers will end up doing. Saving and loading data is a fundamental part of game development and can be used for a variety of things such as saving player progress, storing game settings or even saving the state of the game world. There's hundreds of tutorials and ways of approaching this but that doesn't mean you need to roll your own code.
A good save system is built on 3 main principles:
- Flexible: it should be easy to save and load any type of data from anywhere in your game.
- Observable: you should be able to inspect what's being saved and loaded to better understand the state of your game.
- Secure: players should not be able to tamper with their saves. Typically this means saving data on a server but that may prevent players from playing offline.
Building the system described above can be time consuming and complex. That's why we built Talo - a game backend platform that makes it easy to save and load game data. In this tutorial we'll show you how to use Talo to save and load game data in your Godot game.
For more information on Talo's save system, check out the docs.
Game saves using Talo
Talo uses all the principles we've outlined above to make it easy to manage saves in your game:
- Talo lets you have direct control over what data you save and how it's subsequently loaded in.
- Talo provides a dashboard where you can see all the data being saved for a player, making it easier to debug save issues.
- Talo is secure: saves can be created, updated and deleted via the Godot plugin.
- Talo creates encrypted offline saves that are synced up when the player is online.
What are we building?
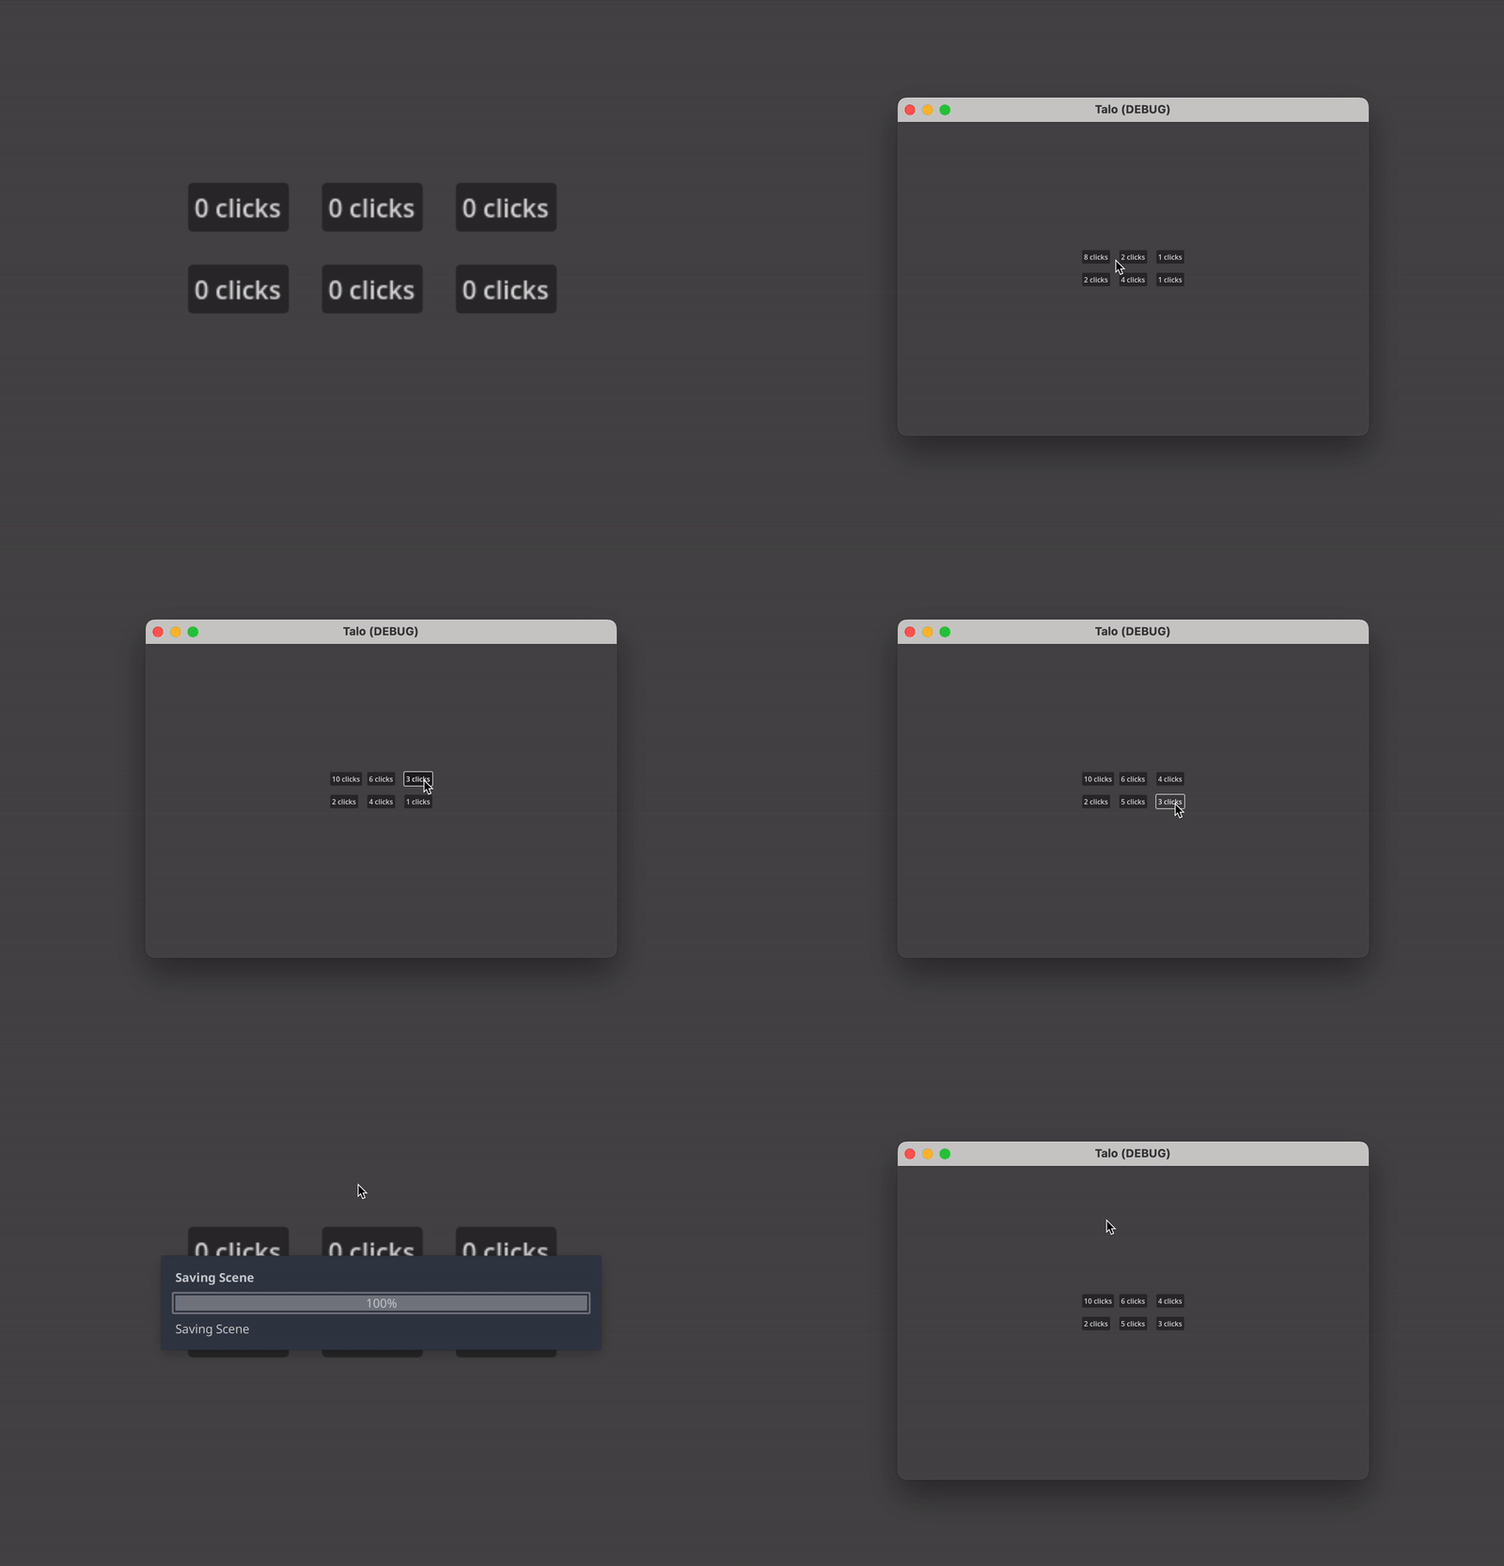
In this tutorial you'll build a simple project that shows creating a save, updating a save and loading a save. The project will have some buttons, each of which can be clicked to increase the number they display. We'll save the state of each button and load it when the game is restarted.
Setup the Talo Godot plugin
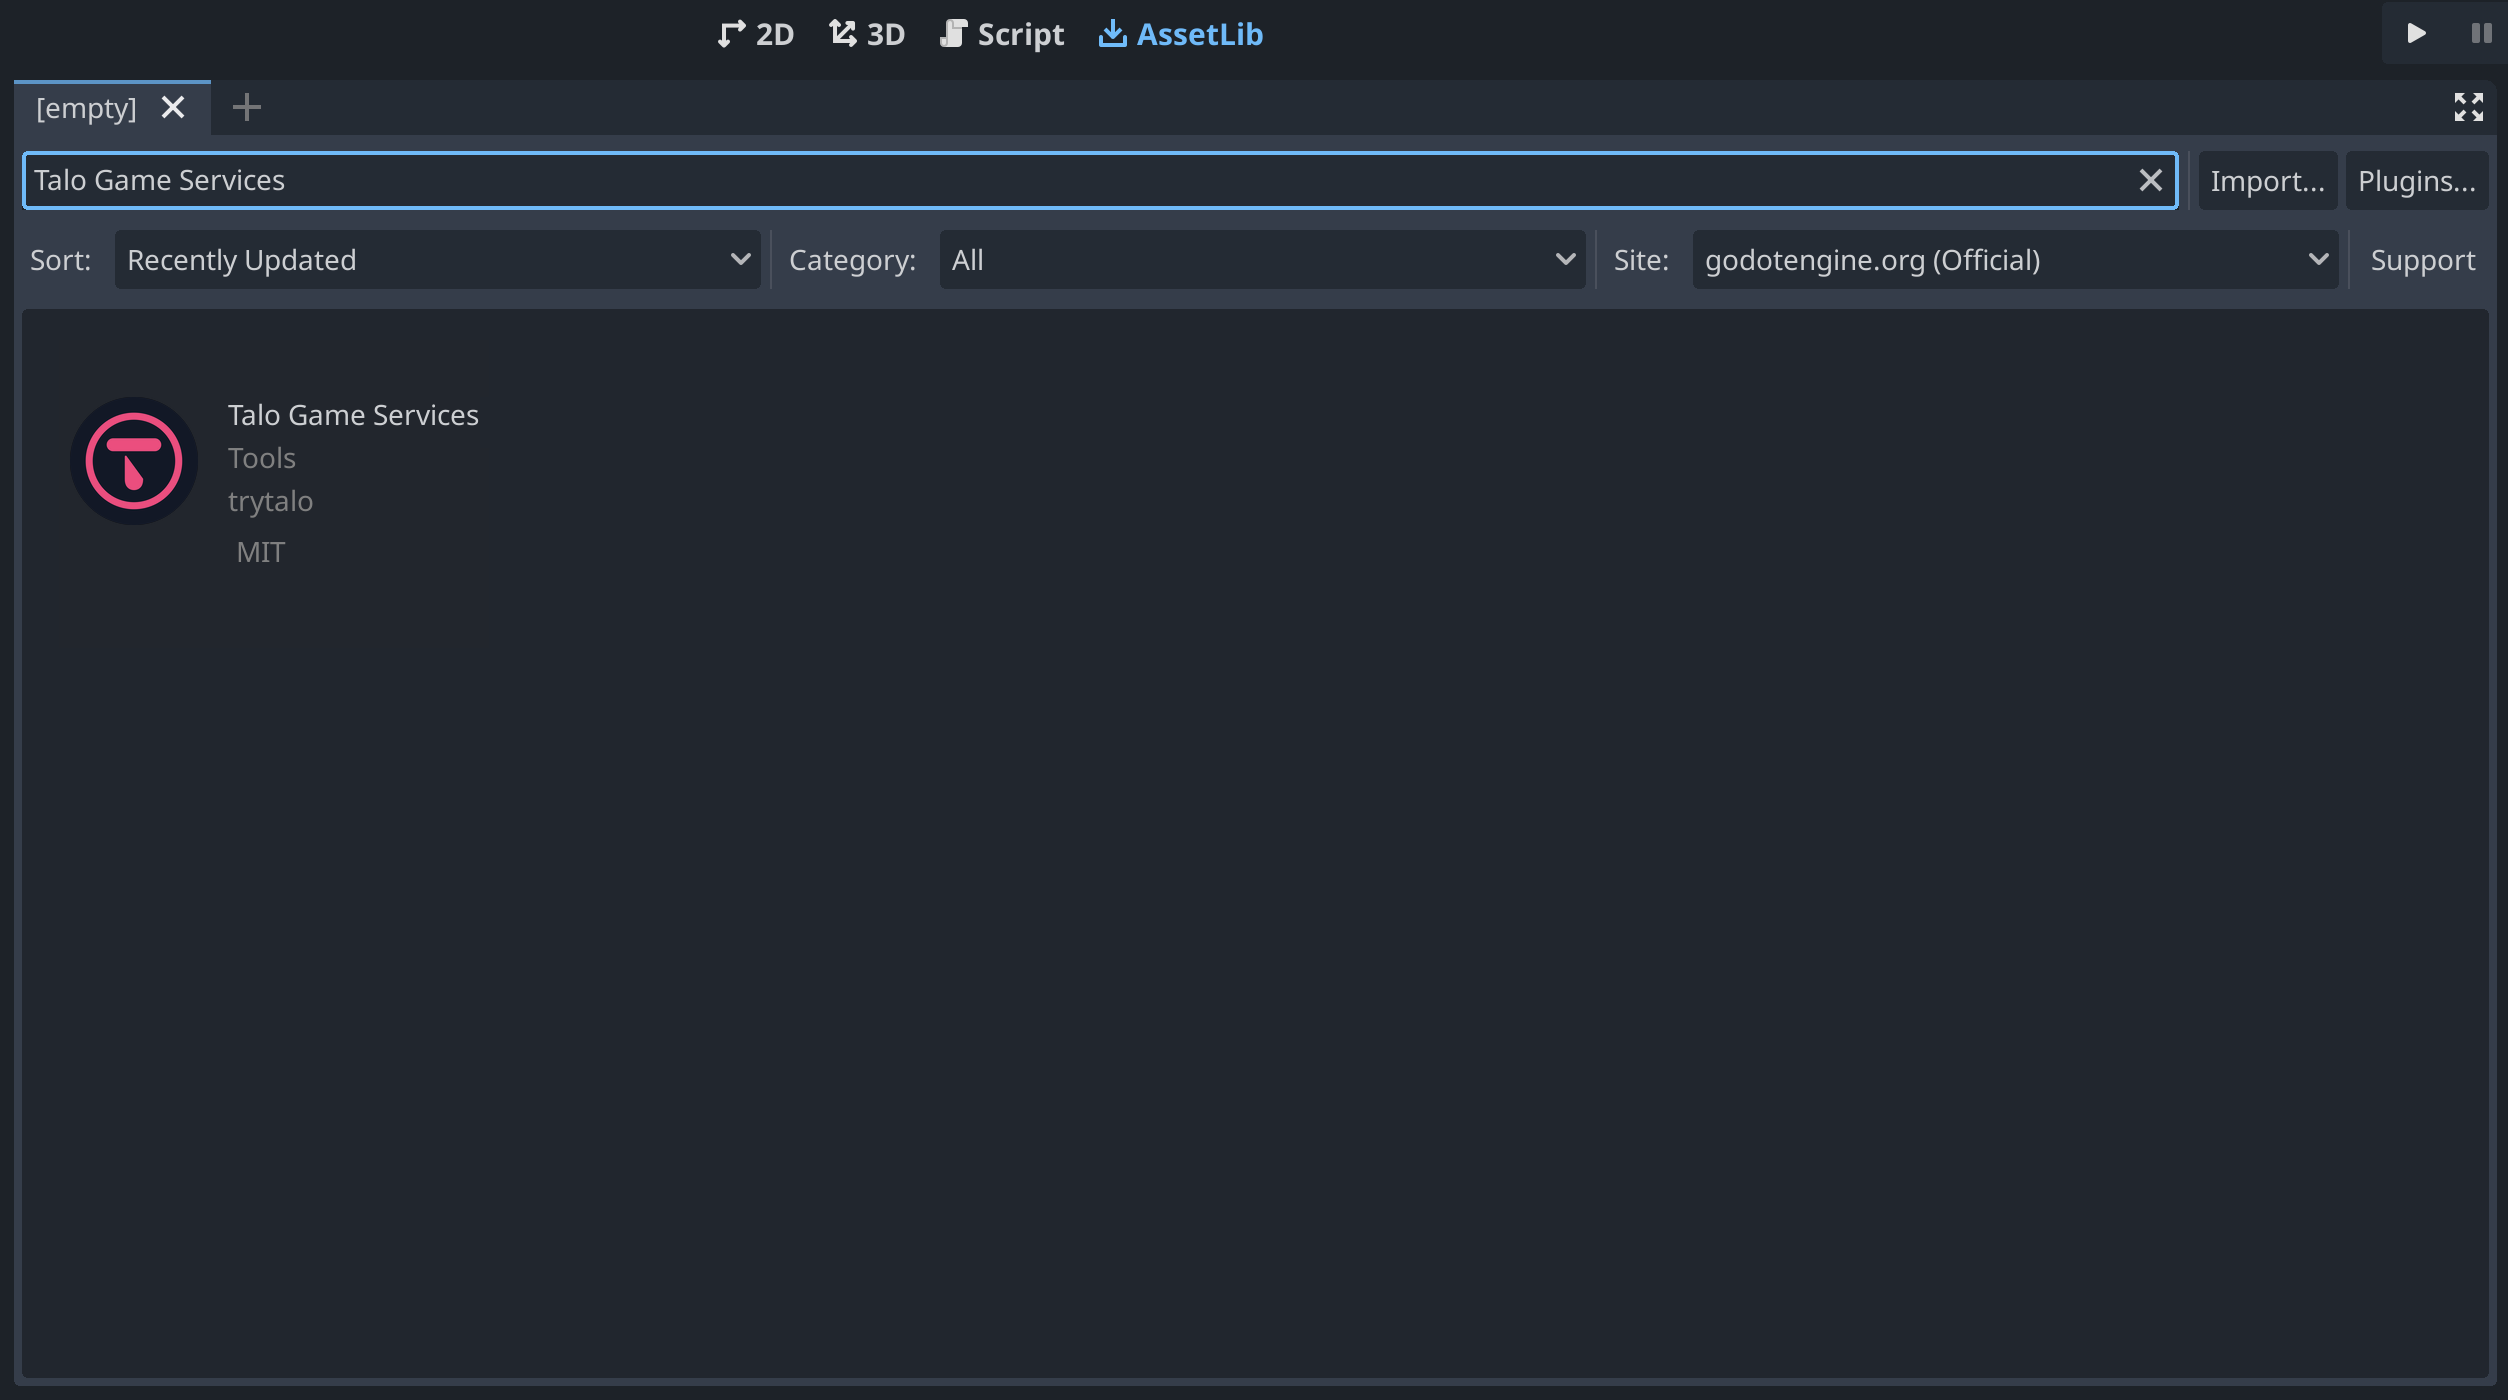
To start saving and loading state, you need to set up the Talo Godot plugin. You can do this by downloading the plugin from the Godot Asset Library (or by searching "Talo Game Services" in the AssetLib tab of the Godot editor). You can also find the latest version of the plugin on itch.io.
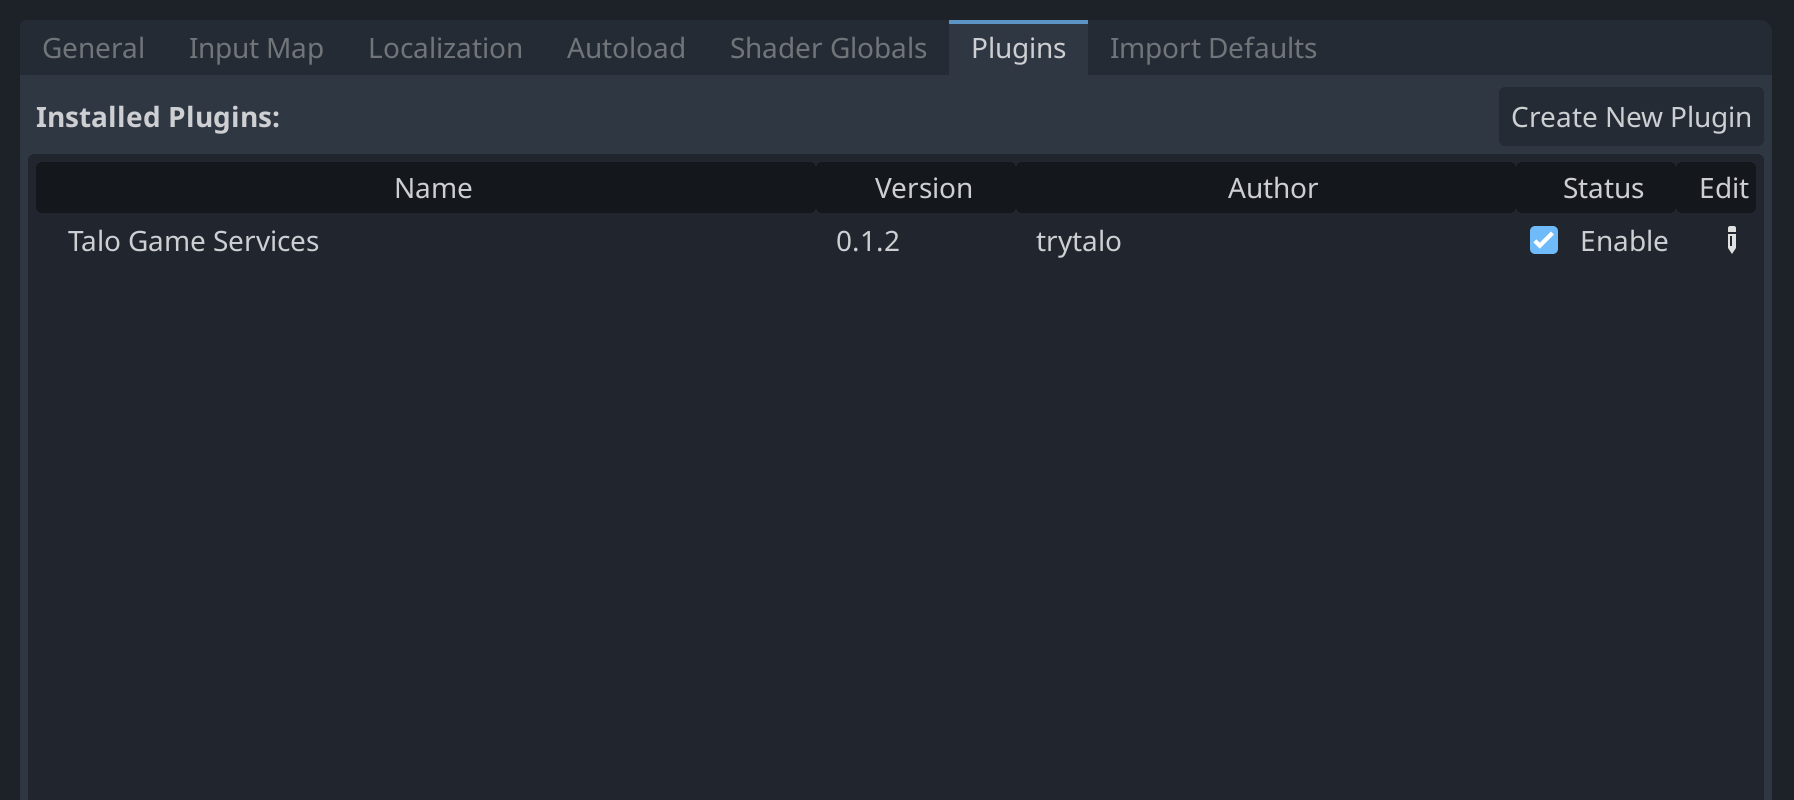
Once you've downloaded the plugin, import it (typically you want to install plugins under the addons folder) and enable it in the Project > Project Settings > Plugins window.
You can now run your game - this will create a settings.cfg asset inside the folder where you installed the plugin - you'll need this later. To learn more about how to configure Talo, including how to configure your self-hosted version, check out the docs.
Generating an access key
Next you need to generate an access key for your game. Visit the Talo dashboard, login or create an account (and confirm your email address). Once logged in, create a new game (if you need to) and visit the Access Keys page.
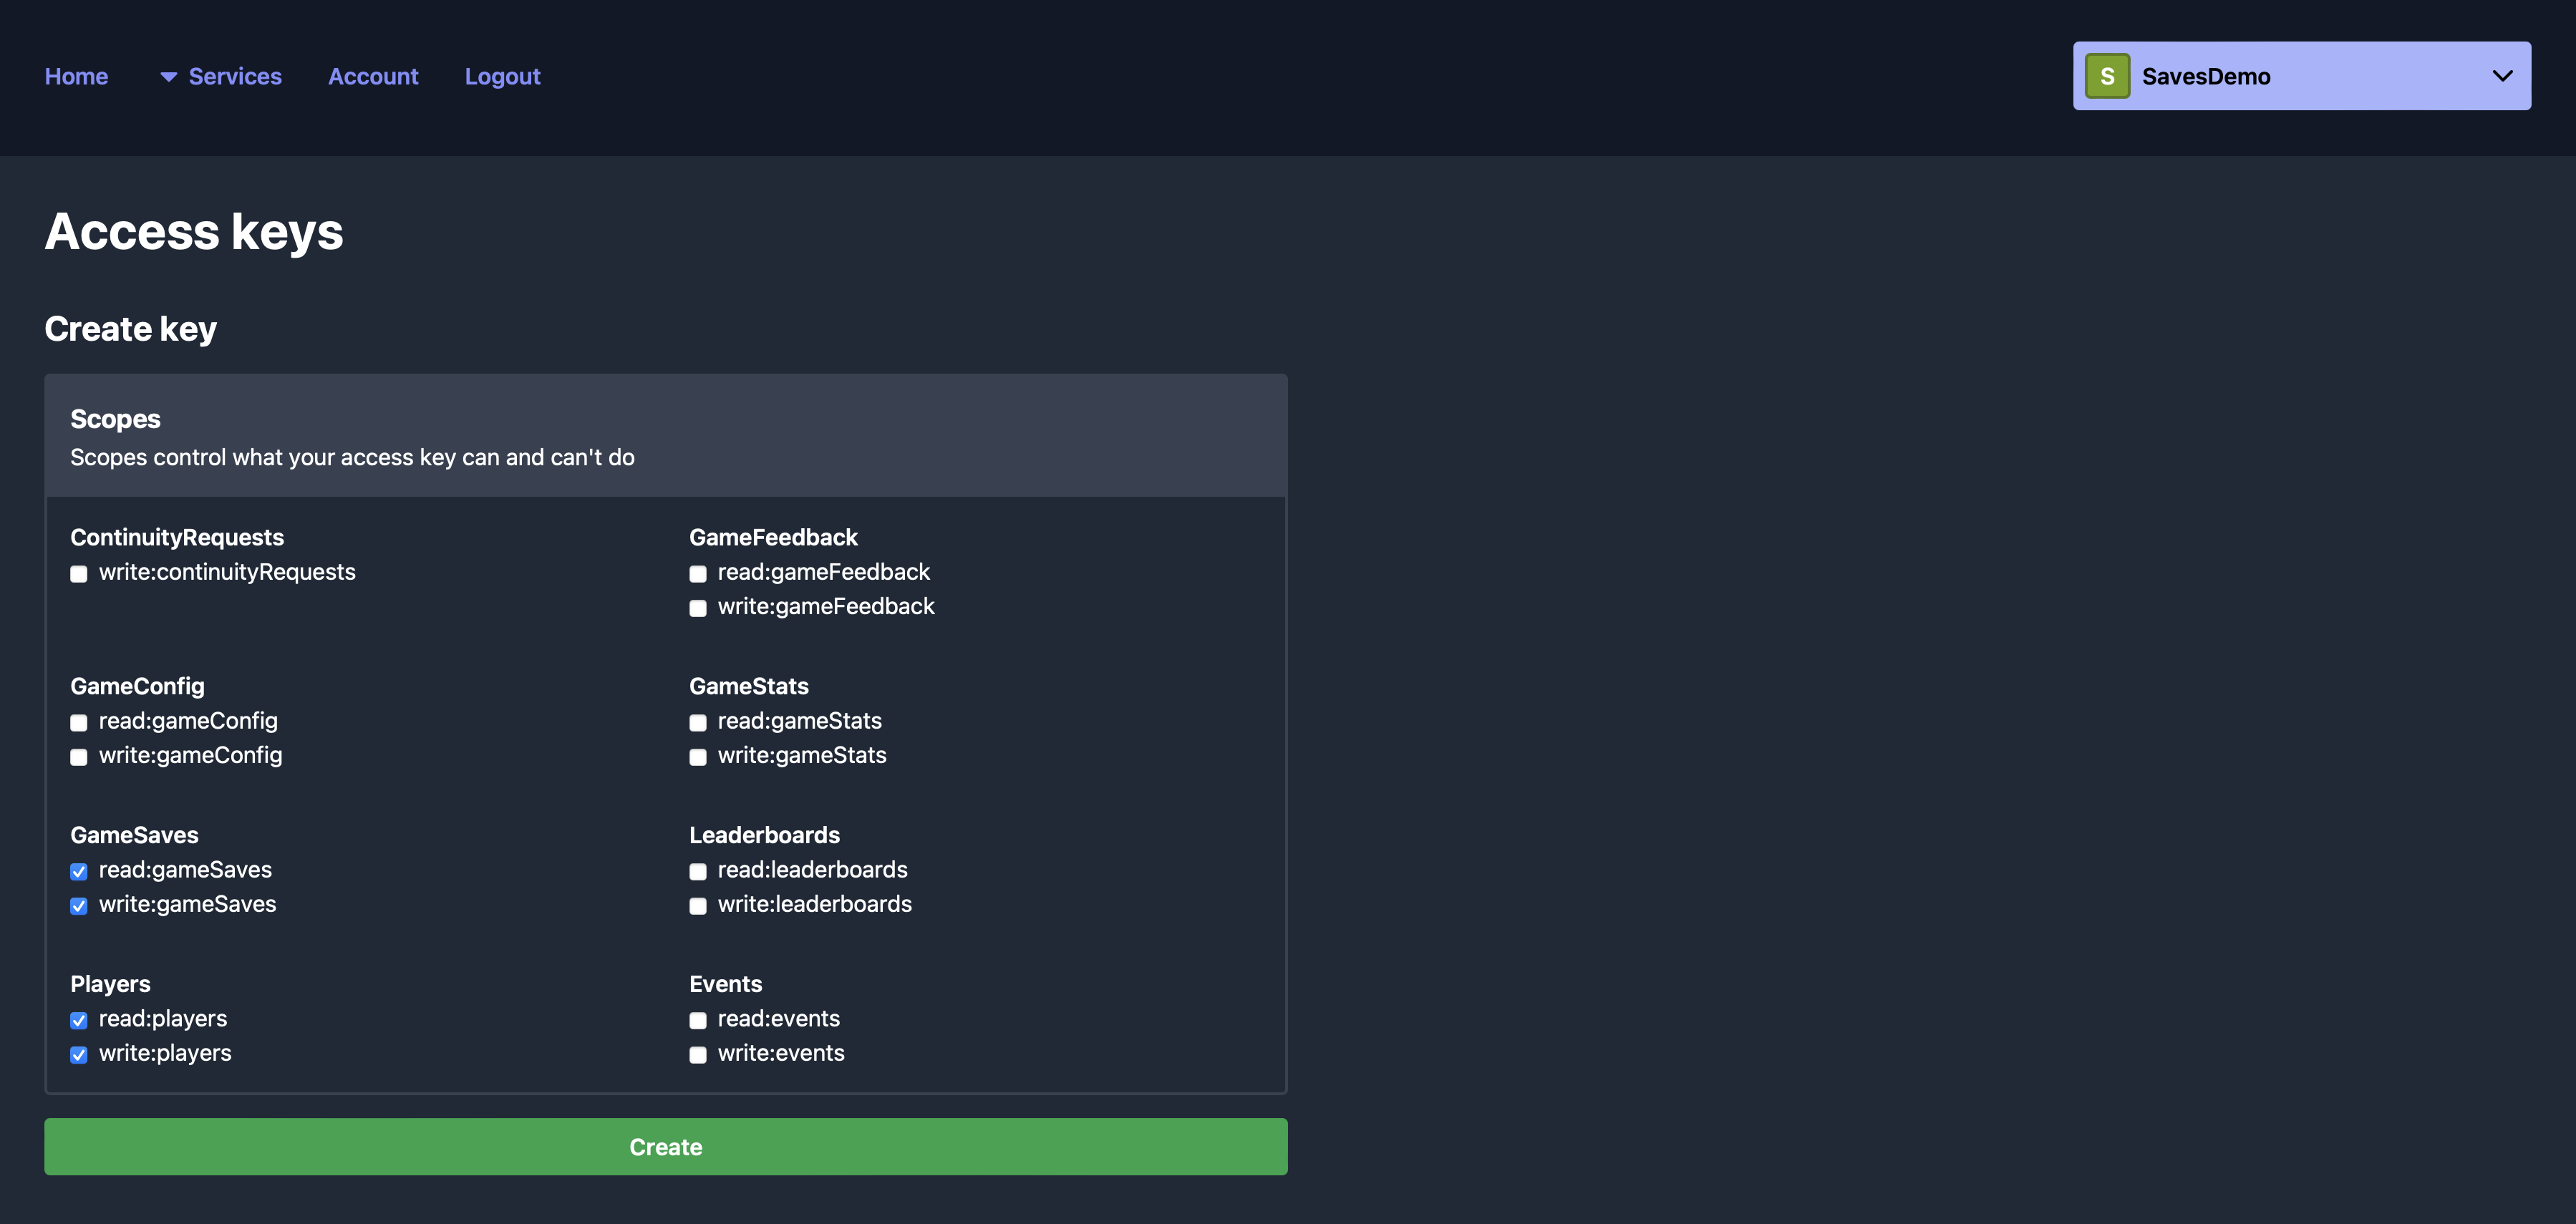
Once there, choose the scopes available to your access key. For this tutorial, you'll need the read:players, write:players, read:gameSaves and write:gameSaves scopes. Create your access key and copy it into the access_key field of the settings.cfg.
Setting up the scene
Let's start by creating a new scene with a Node2D root and add a Control node that has a Button node child. Each button will display the number of times the button has been clicked. Here's the structure of the scene:
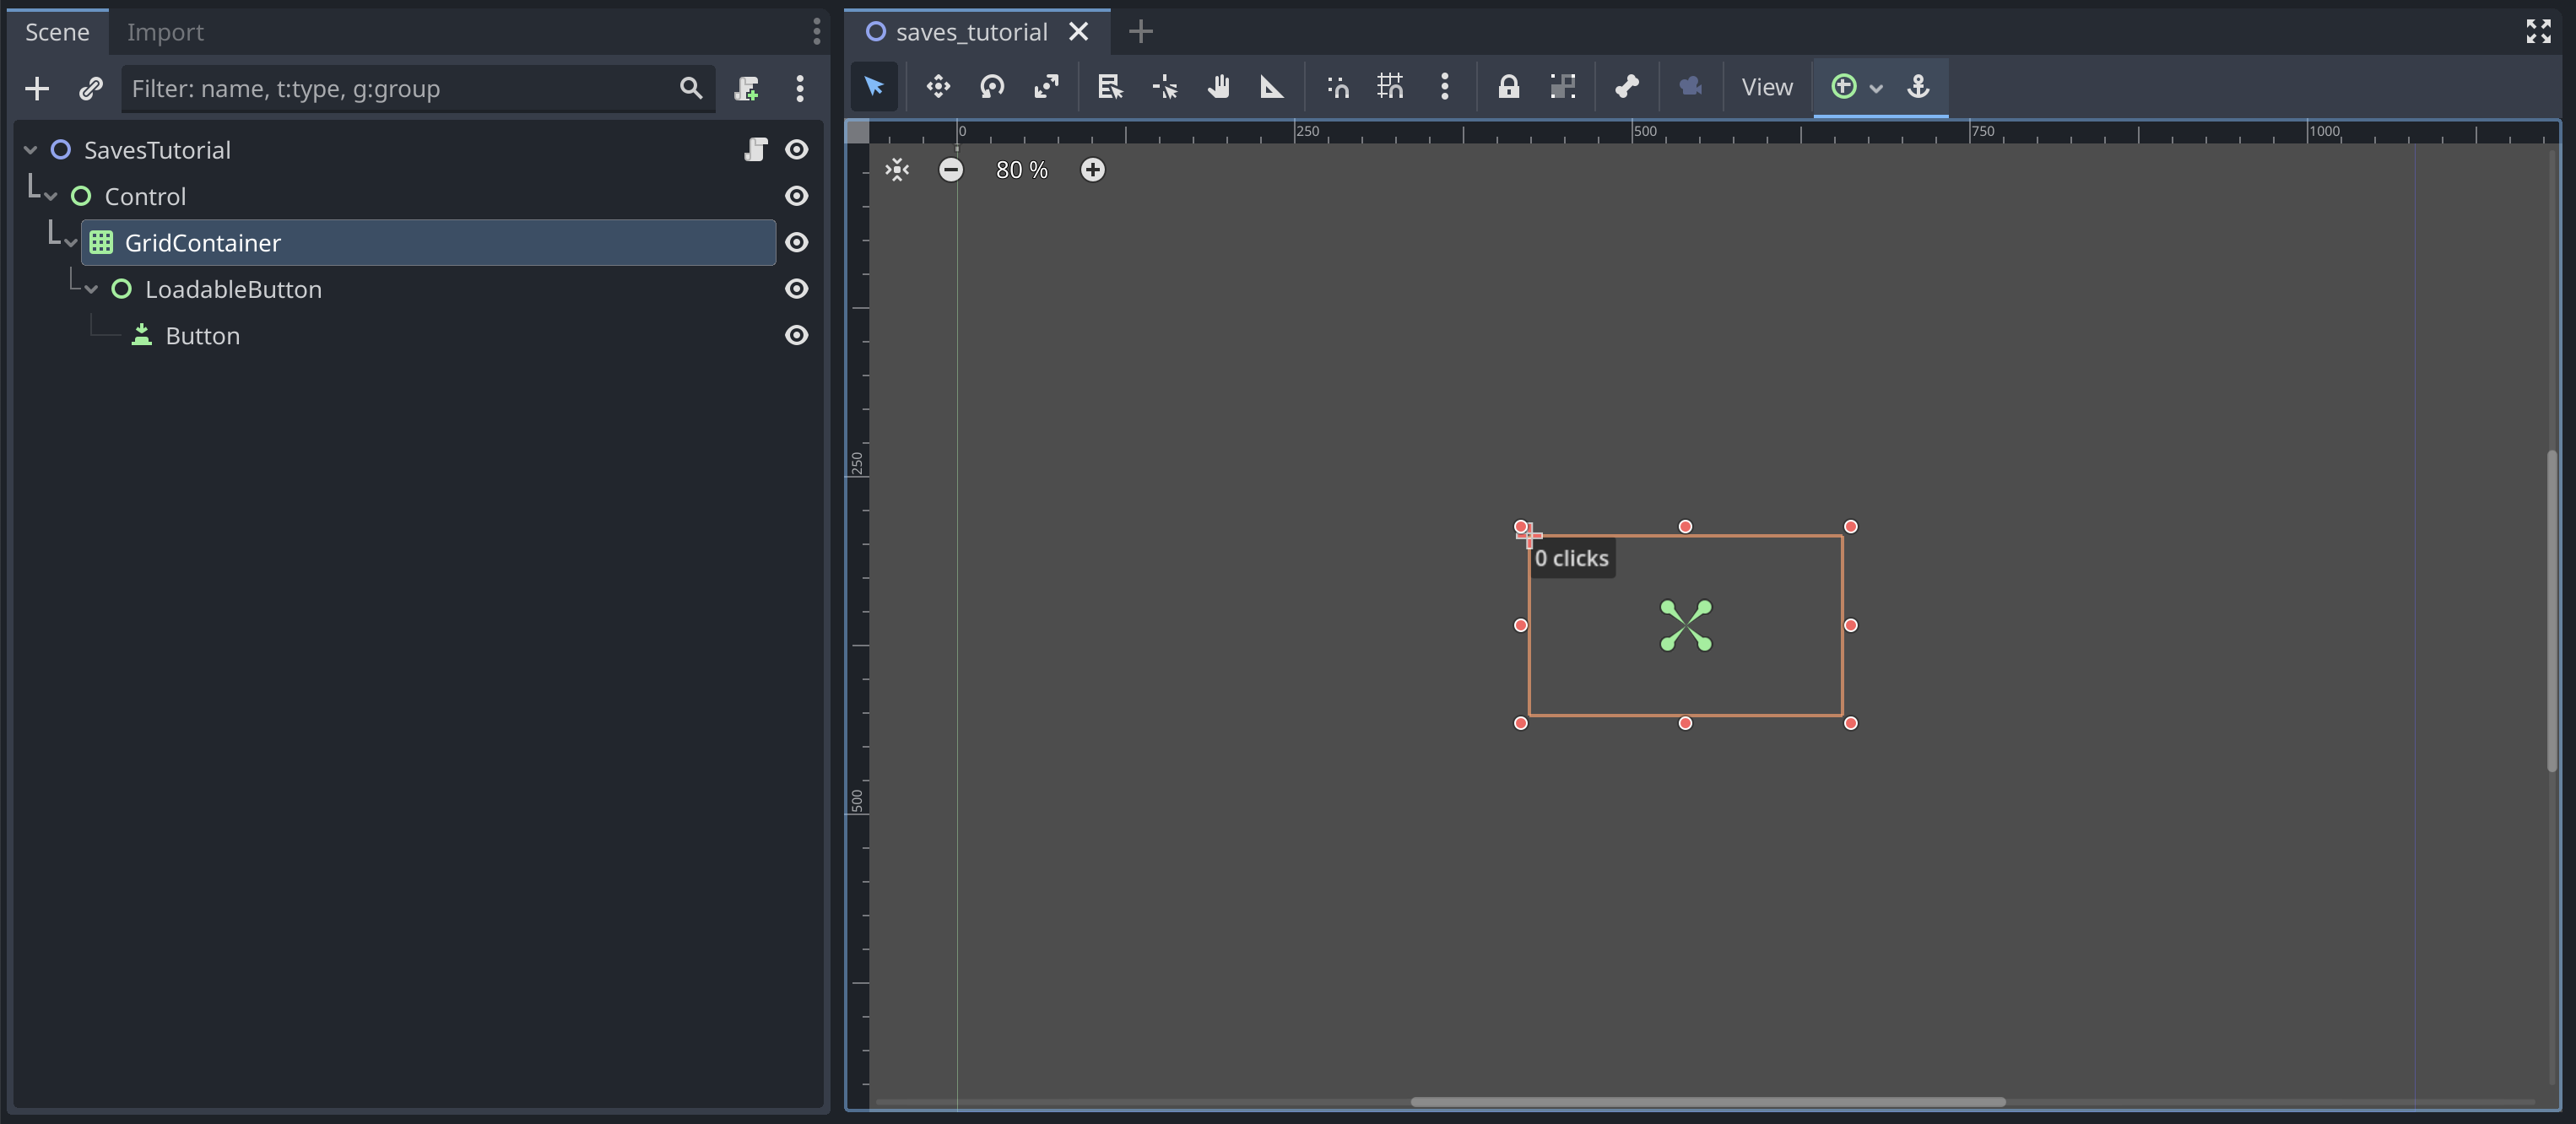
We've used a grid container so we can layout the buttons in a 3x2 grid. You can use any layout you like, but make sure you have a Button node nested under a Control node.
For reference, here's our .tscn file for this scene.
Making buttons loadable
You'll only need two scripts for this demo: one for our buttons and one for managing state.
Let's start with the button script. This script will handle the button's state and update the button's text when clicked. Here's the script you should attach to the Control node (the parent of your Button node):
class_name LoadableButton extends TaloLoadable

var button: Button
var clicks: int = 0

func _ready() -> void:
  super()
  button = get_child(0)

func register_fields() -> void:
  register_field("clicks", clicks)

func on_loaded(data: Dictionary) -> void:
  clicks = data["clicks"]
  button.text = "%s clicks" % clicks

func _on_button_pressed() -> void:
  clicks += 1
  button.text = "%s clicks" % clicks
This script extends TaloLoadable, a helper class provided by the Talo plugin. register_fields tells Talo what fields to save and on_loaded is called when the object is loaded.
You'll need to connect up the pressed() signal on your Button child node to the _on_button_pressed method in the script. You'll also need to add a unique identifier for your button so that Talo knows which button it's saving and loading. You can do this by setting the ID property in the inspector (you could also do this via the script):
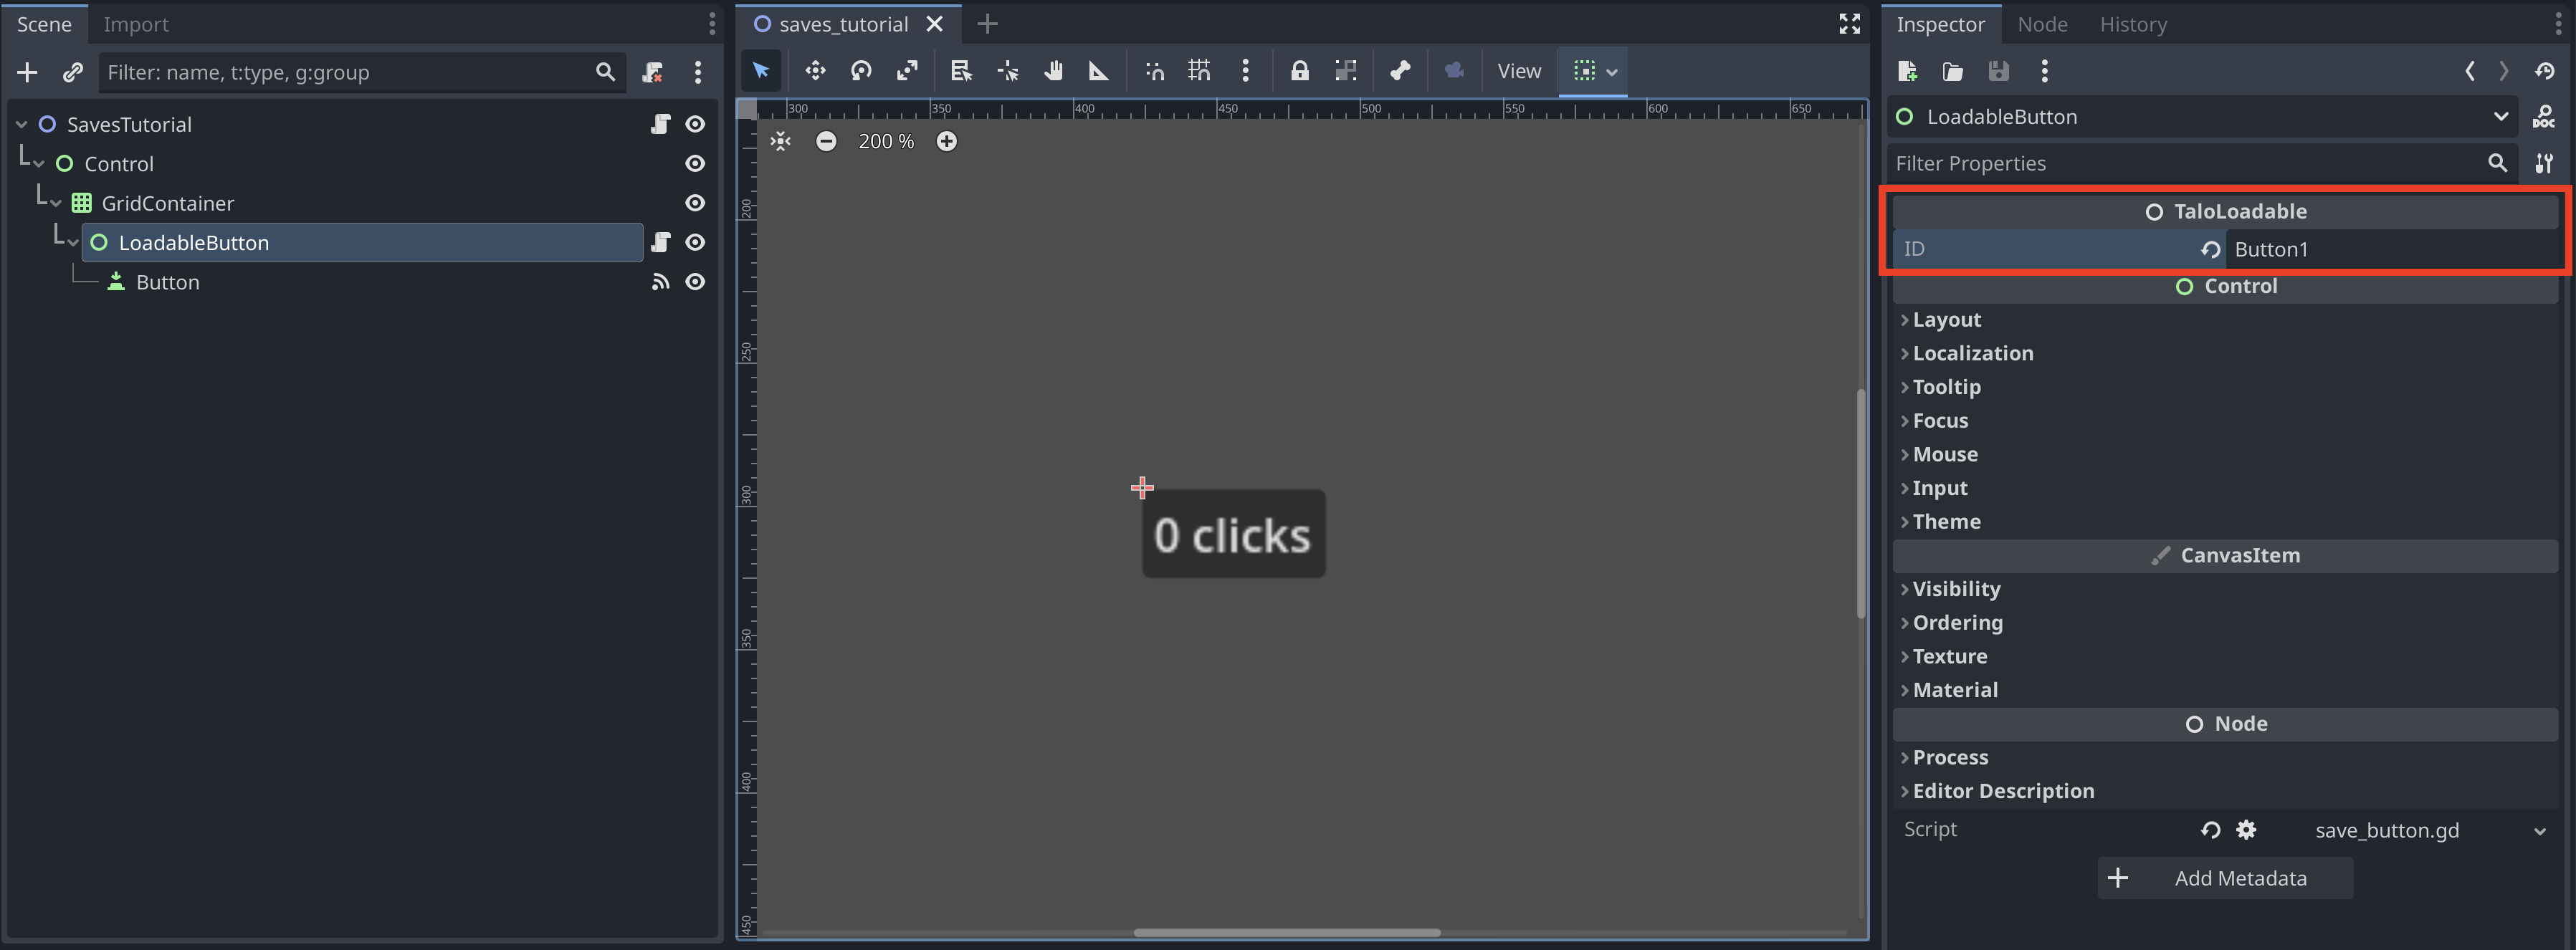
At this point you can duplicate your button container as many times as you like (we're going for 6) and set the ID property to a unique value for each button.
Managing the state
Next, you'll need a state manager to handle loading saves, saving the game state and updating the game state. Create a new script and attach it to the root node of your scene. Here's the script:
extends Node2D

@export var username: String = "username"

func _ready() -> void:
  Talo.players.identified.connect(_on_identified)
  Talo.players.identify("username", username)

func _on_identified(_player: TaloPlayer) -> void:
  var saves = await Talo.saves.get_saves()
  if saves.is_empty():
    await Talo.saves.create_save("save", {})

  await Talo.saves.choose_save(Talo.saves.all.front())
This simple script identifies the player using the username property. It then fetches the player's saves and creates a new save if the player doesn't have any. Finally, it sets the chosen save to the first save in the list.
You'll need to update the LoadableButton script before you can fully test this out. Update the _on_button_pressed method to update the save when it's clicked:
func _on_button_pressed() -> void:
  clicks += 1
  button.text = "%s clicks" % clicks
  await Talo.saves.update_current_save() # update the save
Checking the finished demo
All of the logic is now ready. You can run your game and start clicking the buttons. You should see the number of clicks persist between runs. If you want to test the offline save feature, you can run the game, disconnect from the internet and click the buttons. When you reconnect to the internet and run the game again, you should see the number of clicks persist.
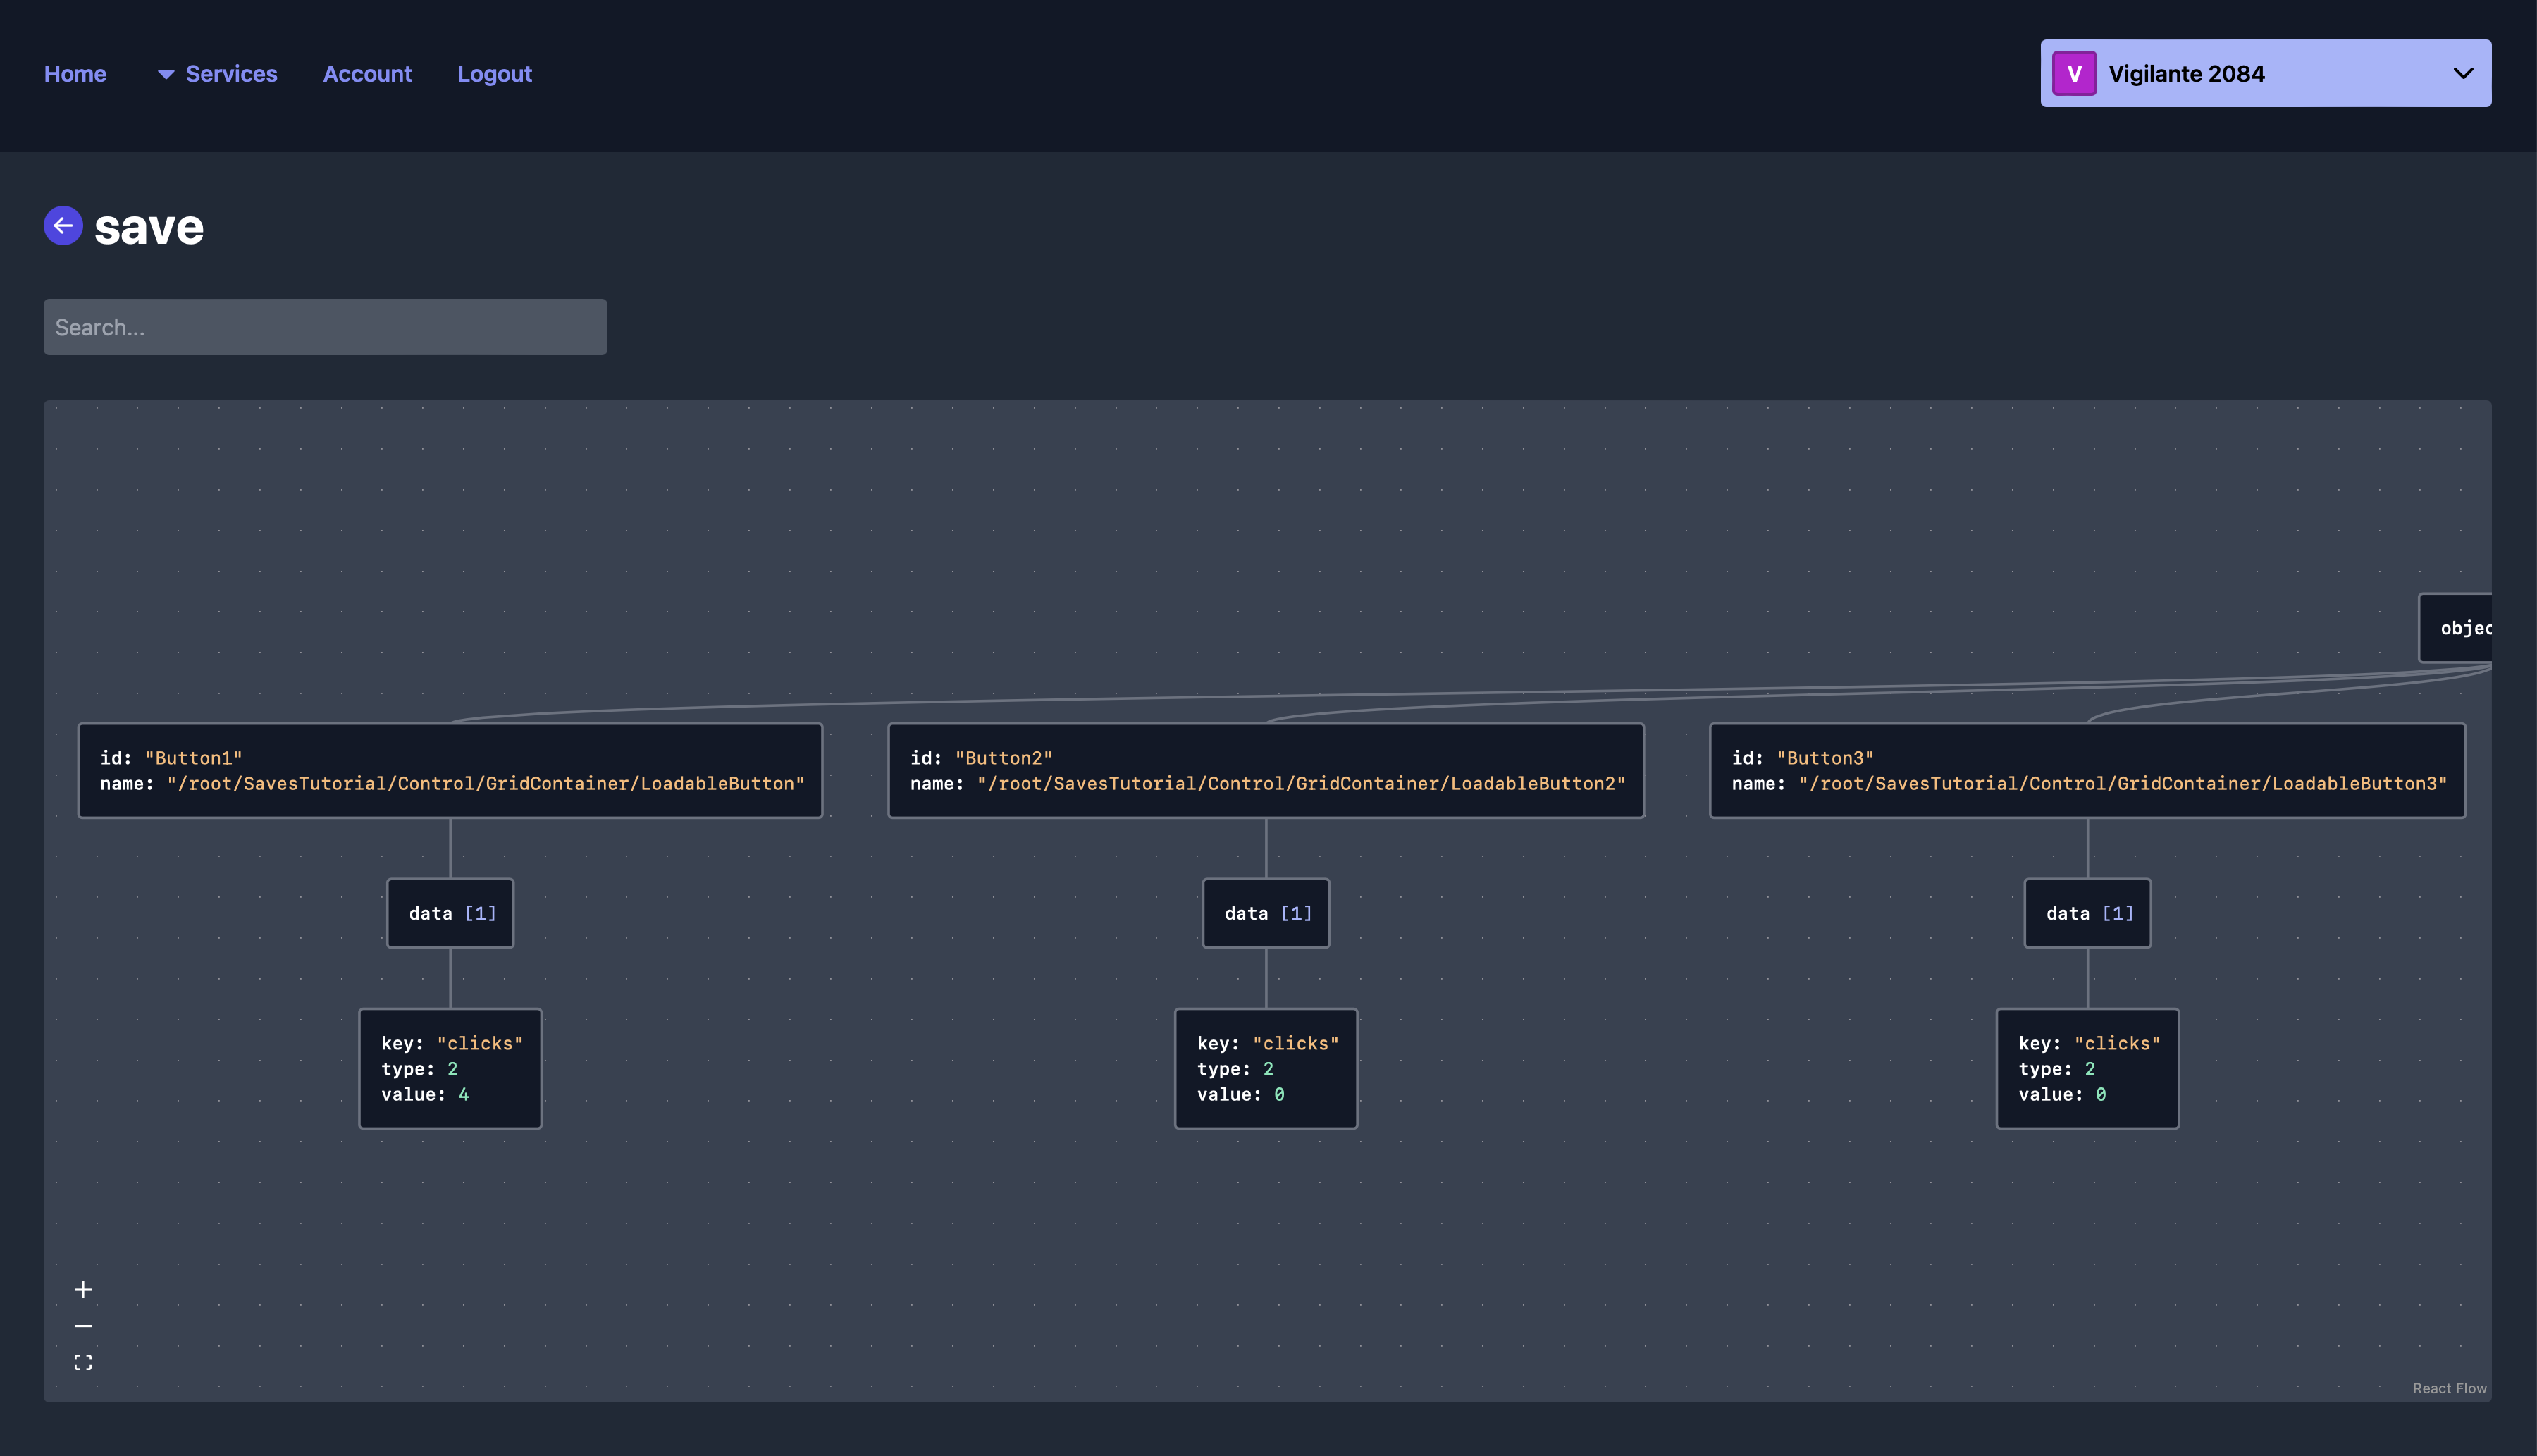
With Talo, you can easily see the content of your save directly in the dashboard. Simply login to the dashboard, head over to the Players service, go to your player's profile and choose Saves. You should be able to see a visual representation of the data saved for your player:
Summing things up
How quick was that!? Using just two scripts, we've shown how easy it is to save and load data with Talo. We've covered how to set up the Talo Godot plugin, create a save, update a save and load saves. You can now extend this script to work with other objects and add more properties. You could even think about automatically setting the ID property on your buttons to make it easier to manage.
Saves are just one of the features Talo provides. You can also use Talo to manage player data, leaderboards, achievements and more. If you're building a game that needs persistence or want to make more data-driven decisions, join our Discord community or follow us on GitHub to keep up to date with the latest and greatest releases for our open source game backend.
Build your game faster with Talo
Don't reinvent the wheel. Integrate leaderboards, stats, event tracking and more in minutes.
Using Talo, you can view and manage your players directly from the dashboard. It's free!
Get started
More from the Talo Blog

Changelog: Player Relationships API and dashboard UX
Build friends lists, followers and other social features with Talo's new Player relationships API.

Collecting Player Feedback in Godot with Talo
Learn how to collect structured, contextual player feedback in your Godot game using categories and props with the Talo Godot plugin.

Friends list & messaging API now live for Godot & Unity
Build friends lists, follower systems and real-time player messaging with our new Player Relationships API. Create social features for your Godot or Unity game without writing your own networking code.
2025 Year in review: release highlights from Talo
Highlights from all the major Talo releases in 2025, plus a sneak peek at the new player relationships API