TL;DR
Talo Live Config is a new way to update your game directly from the web. When players open your Unity game, they'll always receive the latest config. You can even keep your config in sync by checking it before players do specific actions.
The current state of updates
These days there's plenty of ways to update your game, from using SteamPipe to update your game on Steam or Butler to update your game on itch.io.
These tools provide great automation but depend on these updates being delivered to players at the right time or the player needing to download and install the update before progressing.
Plenty of problems come up with these approaches, like needing to check if a player is on the latest version, and if not, providing some UI that prompts them to go and download (or find) the latest version.
On mobile app stores sometimes you need to wait for a review for minor wording changes or to enable a seasonal event. These reviews can take days to finally be completed.
Live config
Using live config you can update your game directly from the web. When players open your game, they'll always receive the latest config. You can even keep your config in sync by checking it before players do specific actions.
In this tutorial you'll integrate live config into your Unity game in a few simple steps.
Setup
You can use Talo in any modern Unity game by simply importing the package using the Unity Asset Store. For this demo, I've created a project using the Core 2D template - but you can use any template you like.
Once you've loaded or created a project, go to the "My Assets" window (by navigating to Window > My Assets). Find "Talo Game Services" and download it.
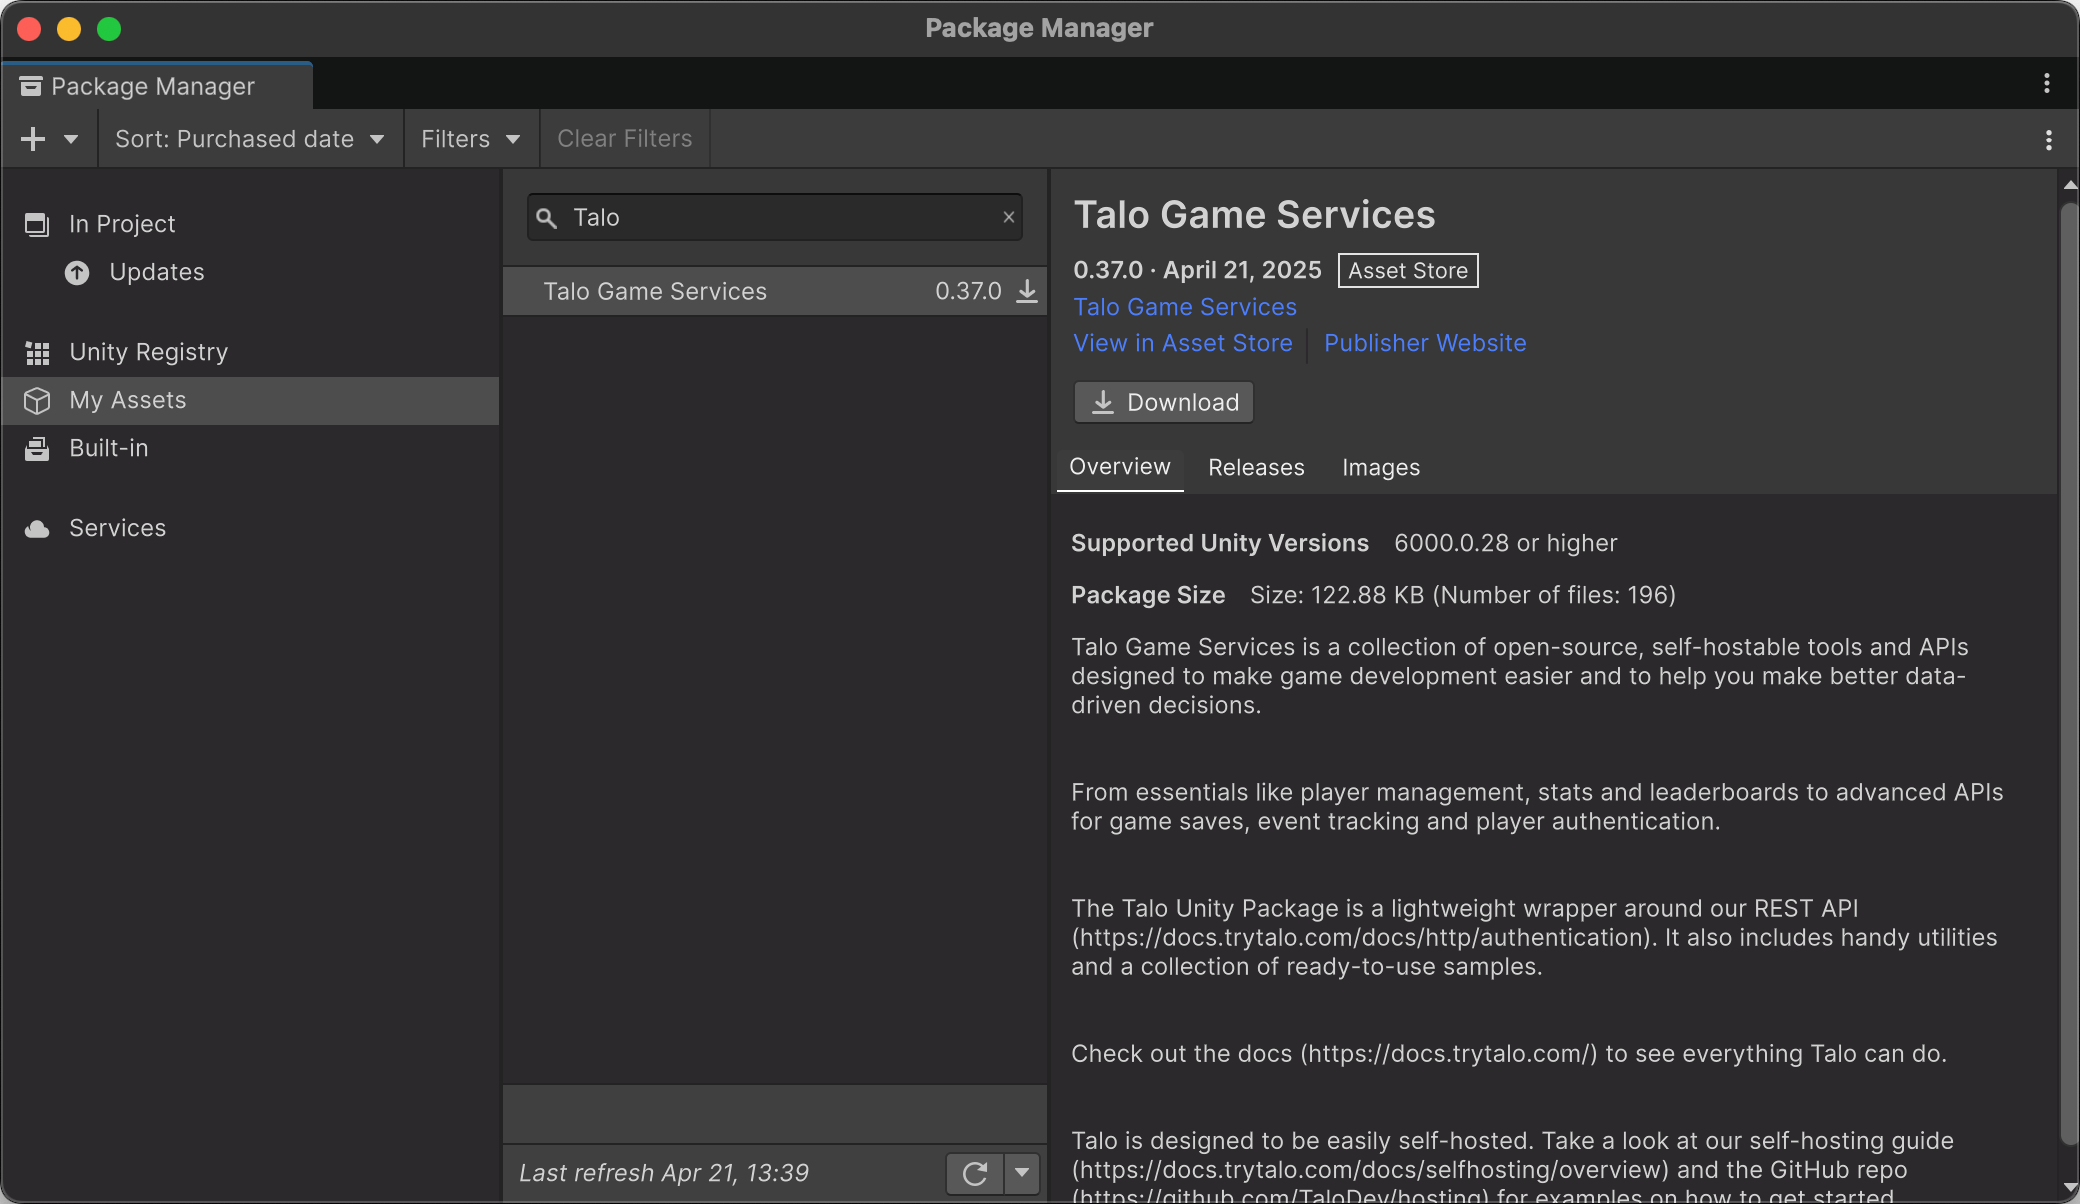
We've now added the Talo package to our Unity project.
Next, if you don't already have a Resources folder, create one inside the Assets folder. This folder allows you to load assets at run-time through code. Inside this folder, right-click and select Create > Talo > Settings Asset.
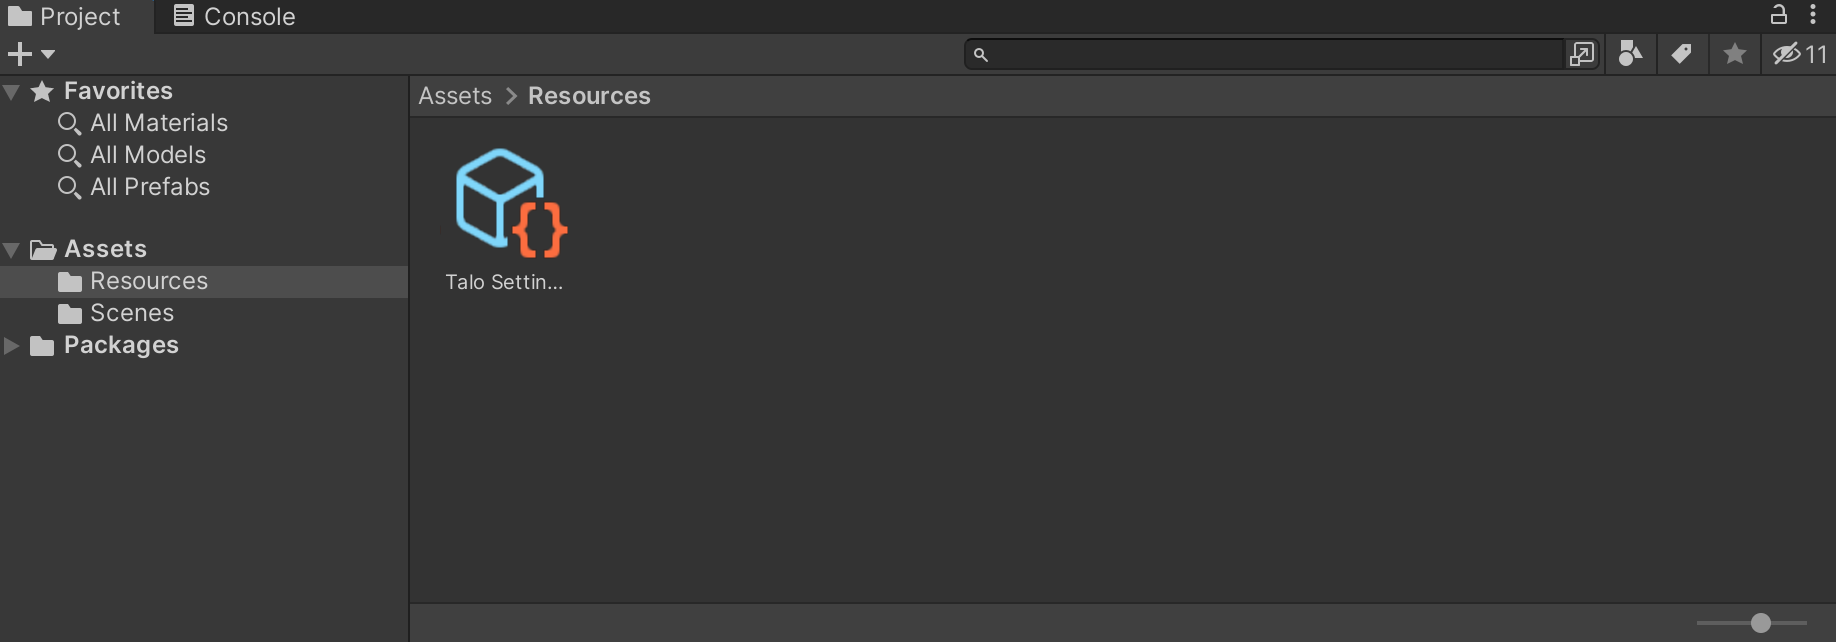
If you click into this Asset, you'll find a number of configuration options. The two important ones are API url (which you can change if you're choosing to self-host Talo) and Access key which identifies your game. You'll need to create an access key through the Talo dashboard.
Generating an access key
Visit the Talo dashboard, login or create an account (and confirm your email address). Once logged in, create a new game (if you need to) and visit the Access Keys page.
Choose the scopes available to your access key (you'll need the read:players, write:players and read:gameConfig scopes) and create your access key. Copy your newly-generated access key into the Access key field on the Settings Asset.
Setting up the scene
As part of this tutorial we'll be creating a piece of text and using live config to get the latest version of the string. You can apply this pattern to any concept in your game - like checking the max level a player can reach or if a seasonal event is currently enabled.
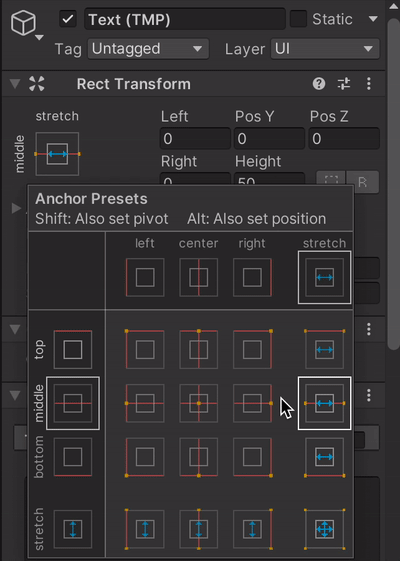
To start off, right-click your scene hierarchy and select Create > UI > Text - TextMeshPro. You will need to import the TextMeshPro assets if you haven't already.
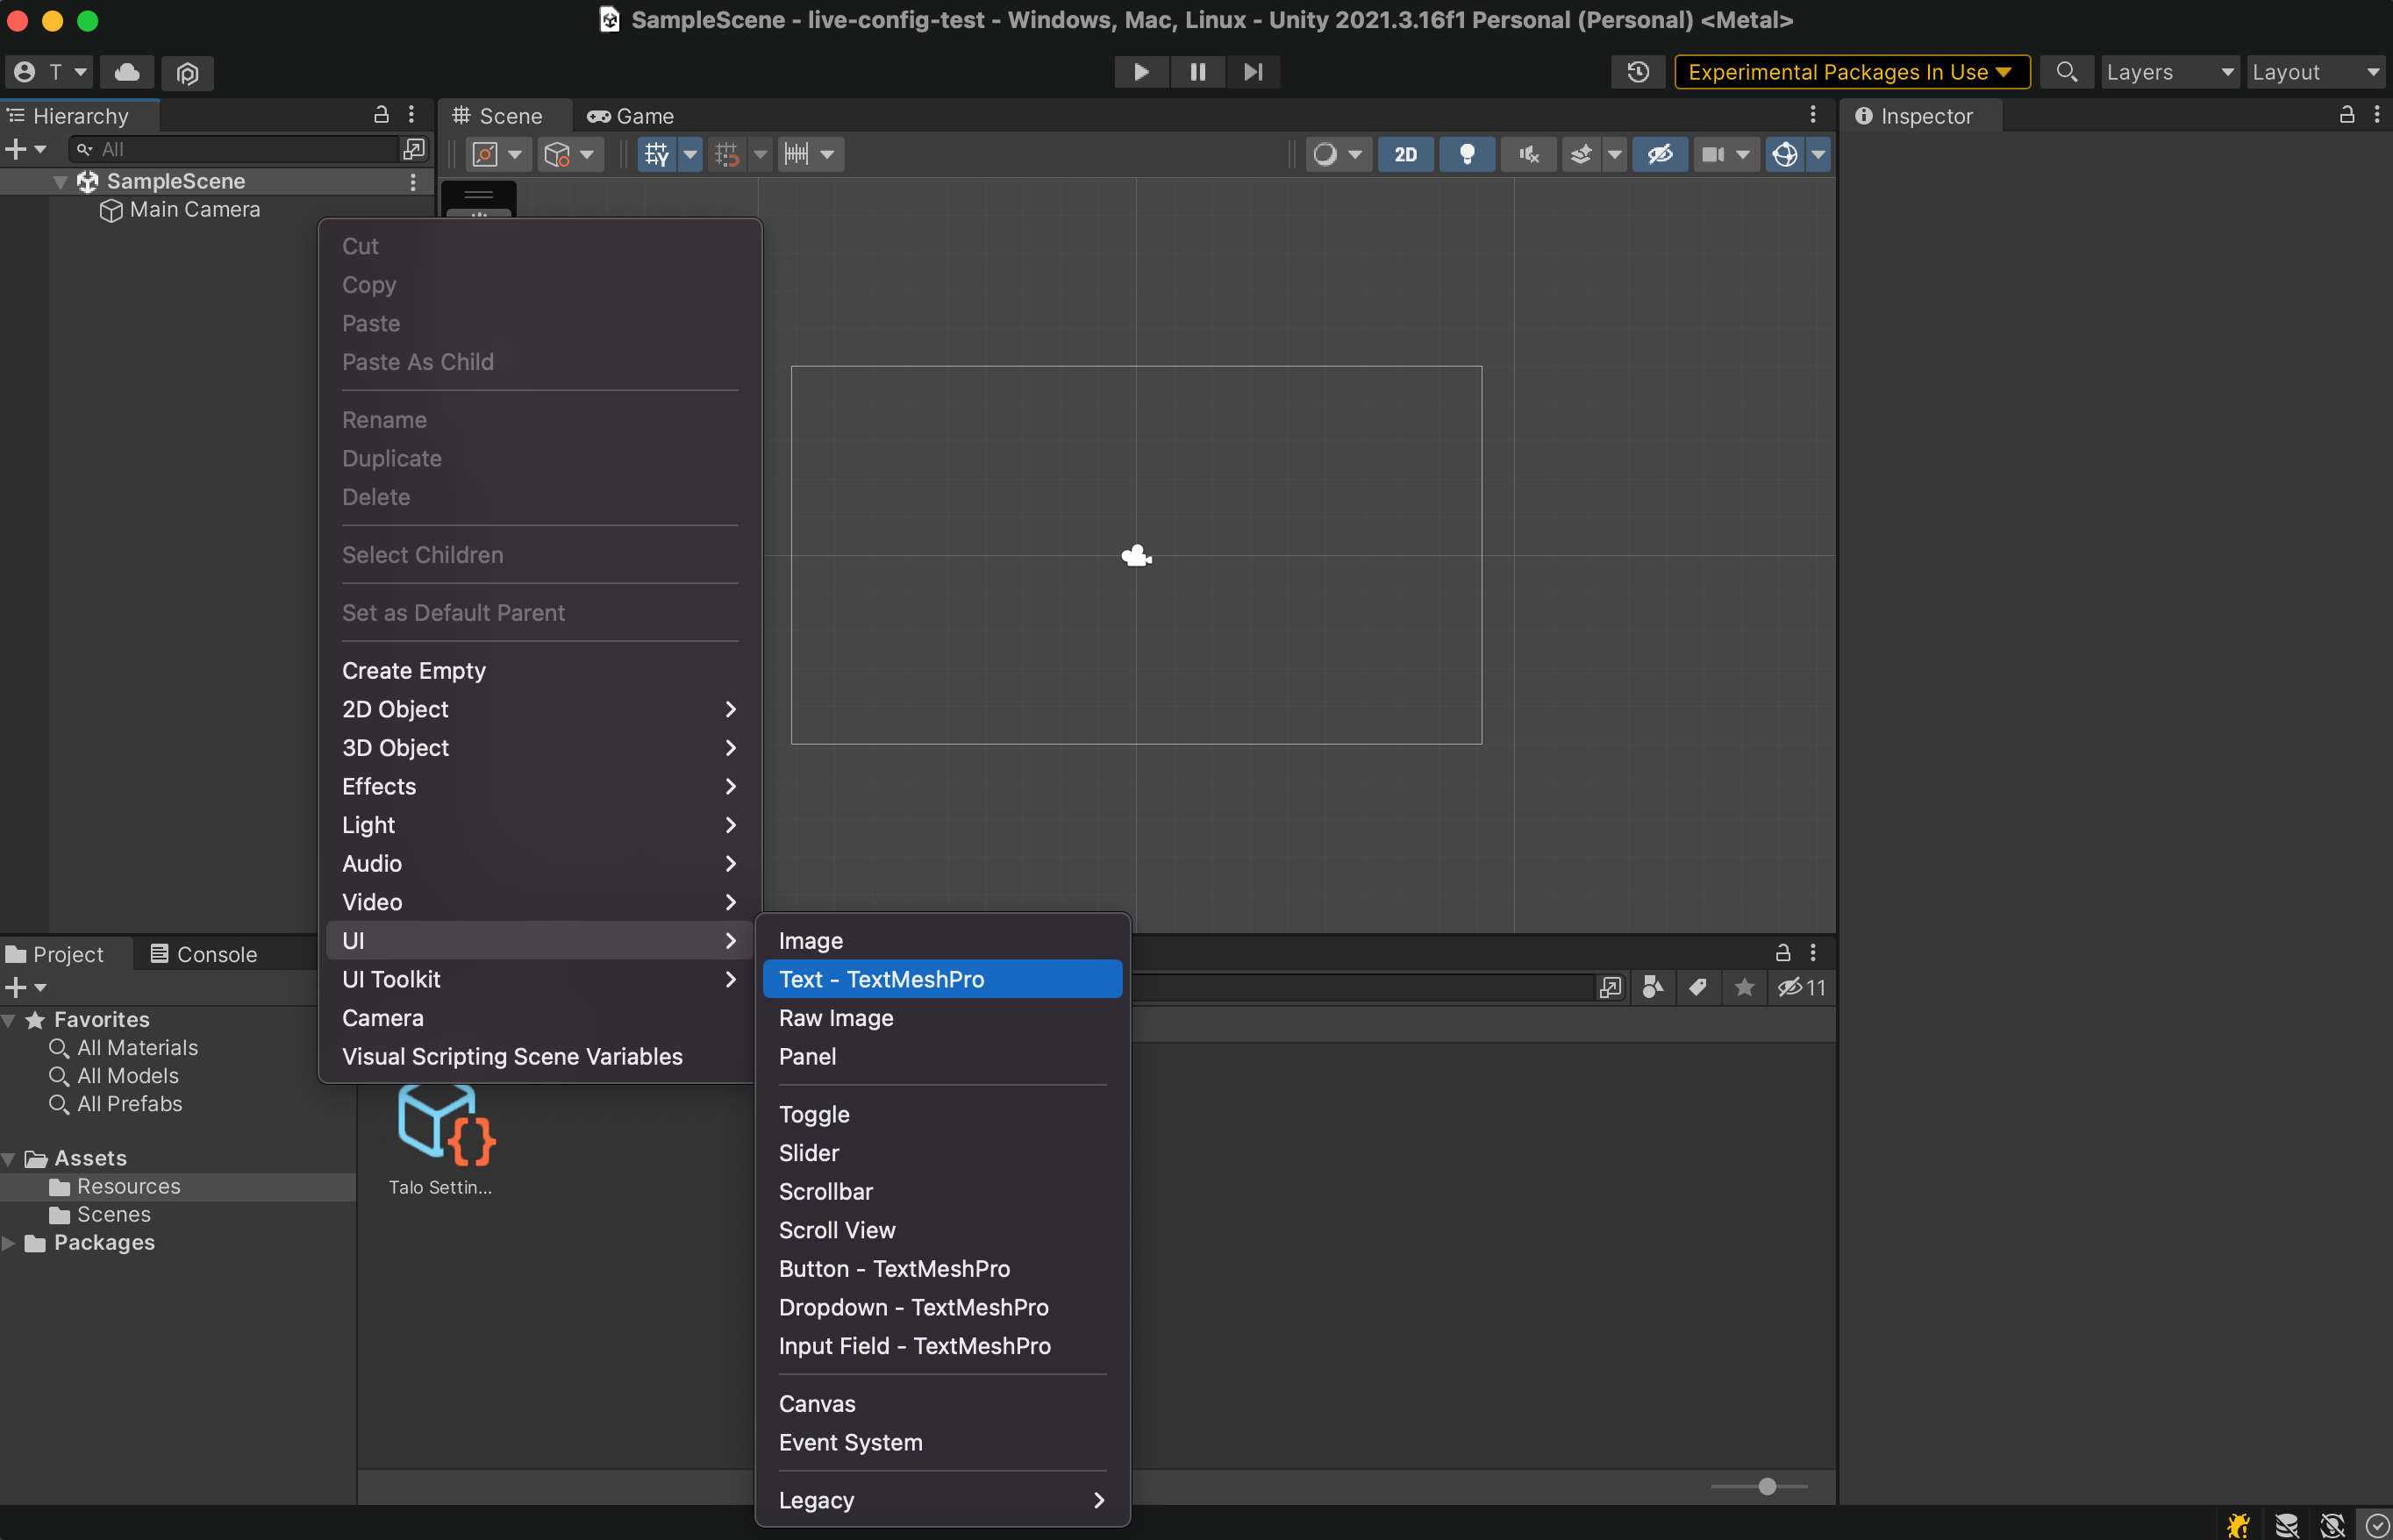
I've centred the text and moved it to the middle of the screen to make it easier to see by holding Shift to set the pivot and Alt (or Option on MacOS) to set the position.
Next, add a new script to your Text object - I've named mine TextLoader. Open up your new script.
Querying the live config
The first thing we need to do in our script is import the namespaces we'll be using. Add the following namespaces:
using TMPro;
using TaloGameServices;
Now we can use functions from the TextMeshPro and Talo namespaces. Here's what we want the script to do:
- Fetch down the live config for our game
- Get the value of the string
- Update the UI to reflect the live config value of our string
Doing this is really easy - all you need to do is update the Start() method of the script:
async void Start()
{
    var textUI = GetComponent<TextMeshProUGUI>();

    Talo.GameConfig.OnLiveConfigLoaded += (liveConfig) =>
    {
        textUI.text = liveConfig.GetProp("liveString", "Not set!");
    };

    await Talo.GameConfig.Get();
}
Live config works on an event-based system - we're subscribing to the OnLiveConfigLoaded event to instantly update our game once the config has been fetched. We're then inspecting the config we receive and updating the UI with the string we're looking for (or a fallback - if it isn't set).
Once we've subscribed to the event, we fetch the game config. You'll notice that if you run your game, the UI will say "Not set!" because we haven't created the config property in the Talo dashboard.
Creating the live config property
To update your config, visit the Live Config page in the dashboard. You can also access it from the Services dropdown.
Add a new property, name it liveString (the same as we've named it in the script), choose what you want your string to be and finally click Save.
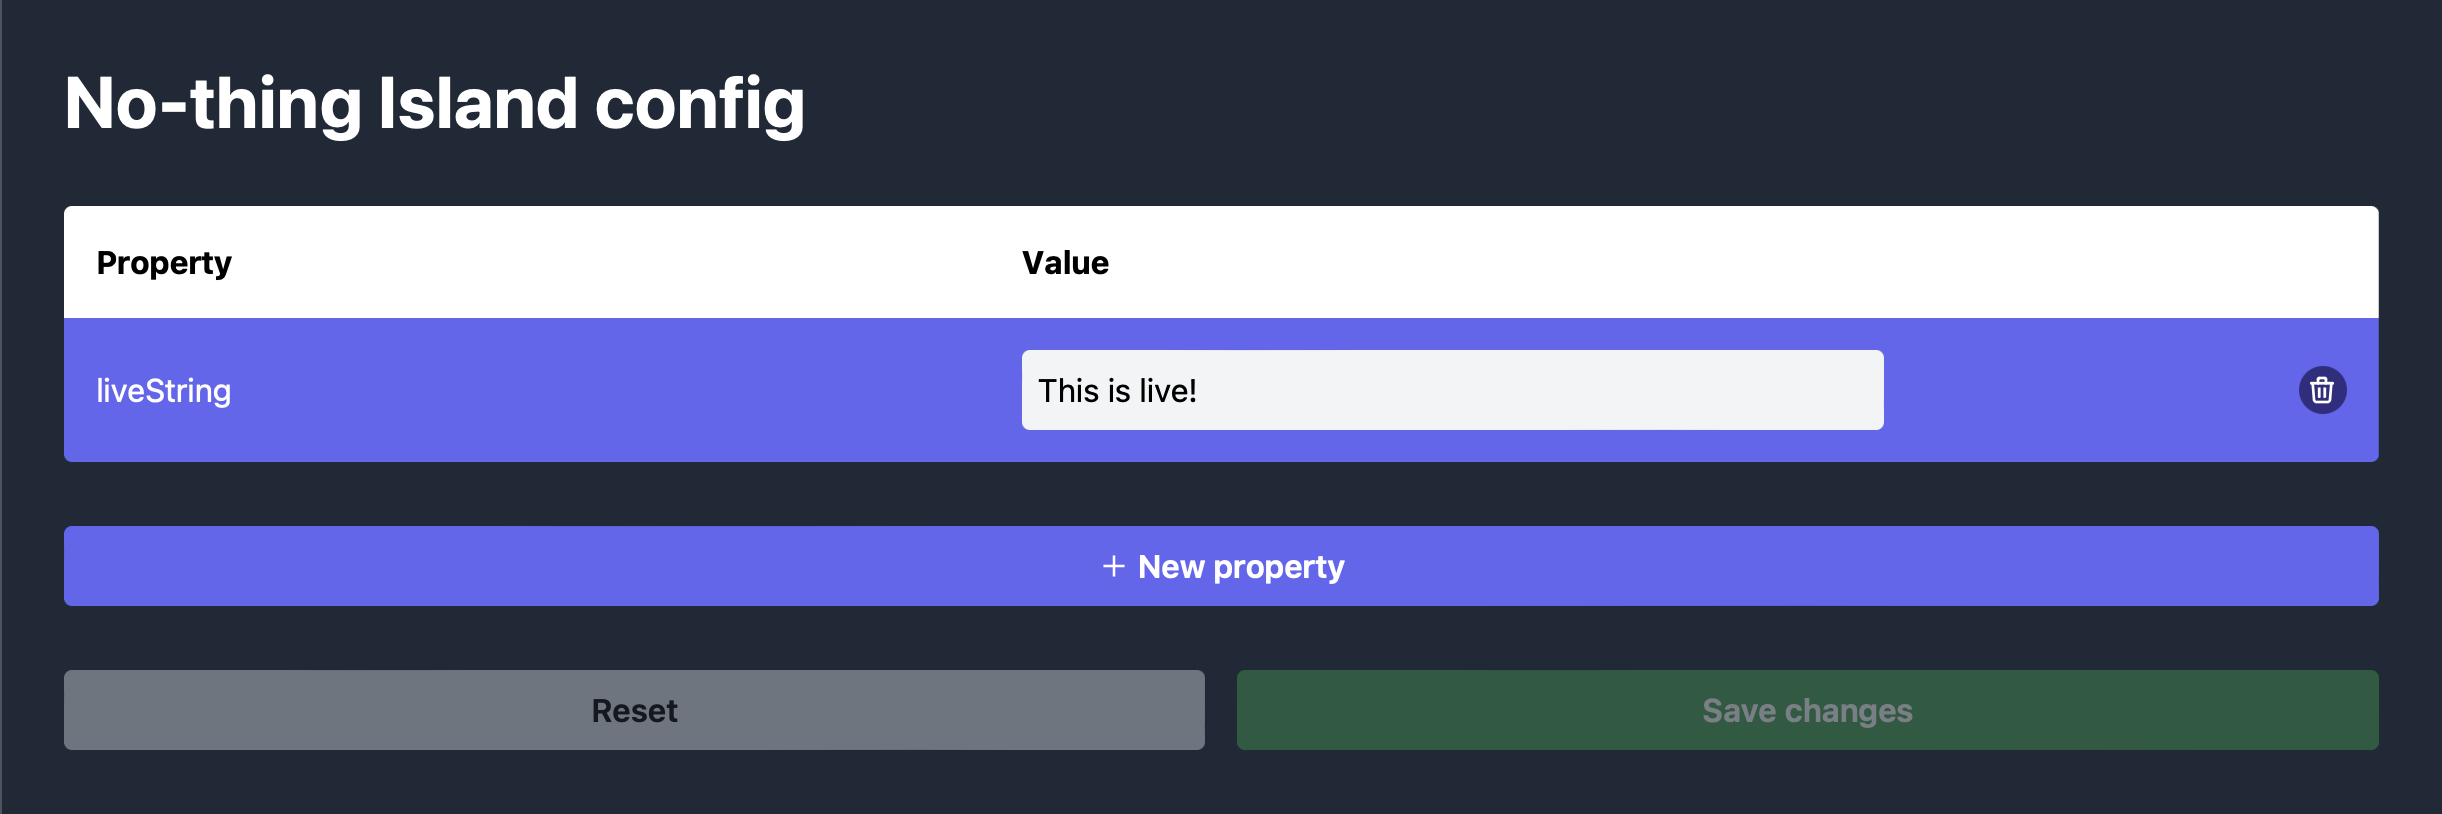
Now when you run your game, you'll see your string directly in your UI. You can update it again in the dashboard and once again your game will always pull in the latest version of the config.
Polling the live config
The GameConfig.Get() method always pulls in the latest version of your config. That means you can check the latest config before a player takes an action or continue to poll for the latest changes:
using UnityEngine;
using TaloGameServices;
using TMPro;

public class TextLoader : MonoBehaviour
{
    void Start()
    {
        var textUI = GetComponent<TextMeshProUGUI>();

        Talo.GameConfig.OnLiveConfigLoaded += (liveConfig) =>
        {
            textUI.text = liveConfig.GetProp("liveString", "Not set!");
        };

        InvokeRepeating("GetConfig", 0f, 2f);
    }

    async void GetConfig()
    {
        await Talo.GameConfig.Get();
    }
}
Unity's InvokeRepeating() calls a method with a delay (that we've set to 0 seconds so it runs instantly) and then every interval after that (which we've set to every 2 seconds).
Wrapping up
While even the smallest updates have traditionally required new releases, Talo's live config lets your game be reactive to the latest changes without releasing a new update or waiting for that update to be approved by an app store.
With only a few lines of code, you can pull in your game config. You can update that config whenever you need to from the Talo dashboard. Check out the docs to learn more about how live config works.
Build your game faster with Talo
Don't reinvent the wheel. Integrate leaderboards, stats, event tracking and more in minutes.
Using Talo, you can view and manage your playersdirectly from the dashboard. It's free!
Get started
More from the Talo Blog

Changelog: Request verification, display names and event pie charts
A new request verification system secures every API and socket call, display names are now available on player aliases and event pie charts make analytics easier to scan.
Request verification is now available for Godot, Unity and the Talo API
Protect your game from replay attacks and request tampering with Talo request verification.
Changelog: Apple Game Center, profanity filters, prop errors
Apple Game Center is now supported and props can be filtered for profanity, alongside structured error codes and a new onboarding page.

Changelog: Google Play Games, player account migration and prop arrays
Google Play Games integration, player account migration, prop arrays, self-service account deletion and more. Here's what shipped in March 2026.