TL;DR
Talo leaderboards make it easy to create and manage leaderboards in your Godot game. In this tutorial, you'll build a simple project that shows fetching entries from a leaderboard and submitting new entries.
Quick and easy leaderboards
Leaderboards are a tried-and-tested way of keeping players engaged with your game. They can be used to show off the best players, encourage competition or even just to give players a sense of progression. In this post, we'll go over how to create a simple leaderboard system in Godot using the Talo Godot plugin.
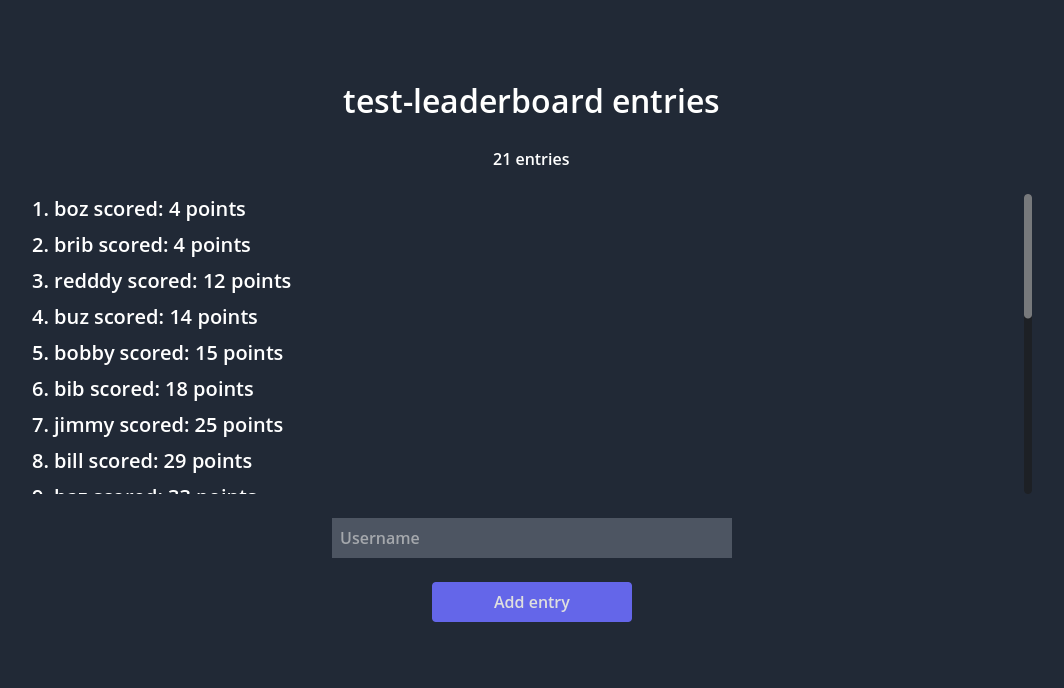
Here's an example of what we'll be building:
Leaderboards through Talo
Talo makes it easy to create leaderboards and interact with them. You can even view real time leaderboard updates in the Talo dashboard. The leaderboards service are customisable and are designed to work across many different genres of games.
Using the Talo Godot plugin, you can easily fetch entries from the leaderboards service without having to set up your own database, webserver or API. Best of all, you can remove suspicious entries directly from the dashboard, making sure your leaderboards are fair and accurate.
Leaderboards in Talo can also be synced up with Steamworks leaderboards, taking advantage of Steam's ecosystem and Talo's observability.
Setup the Talo Godot plugin
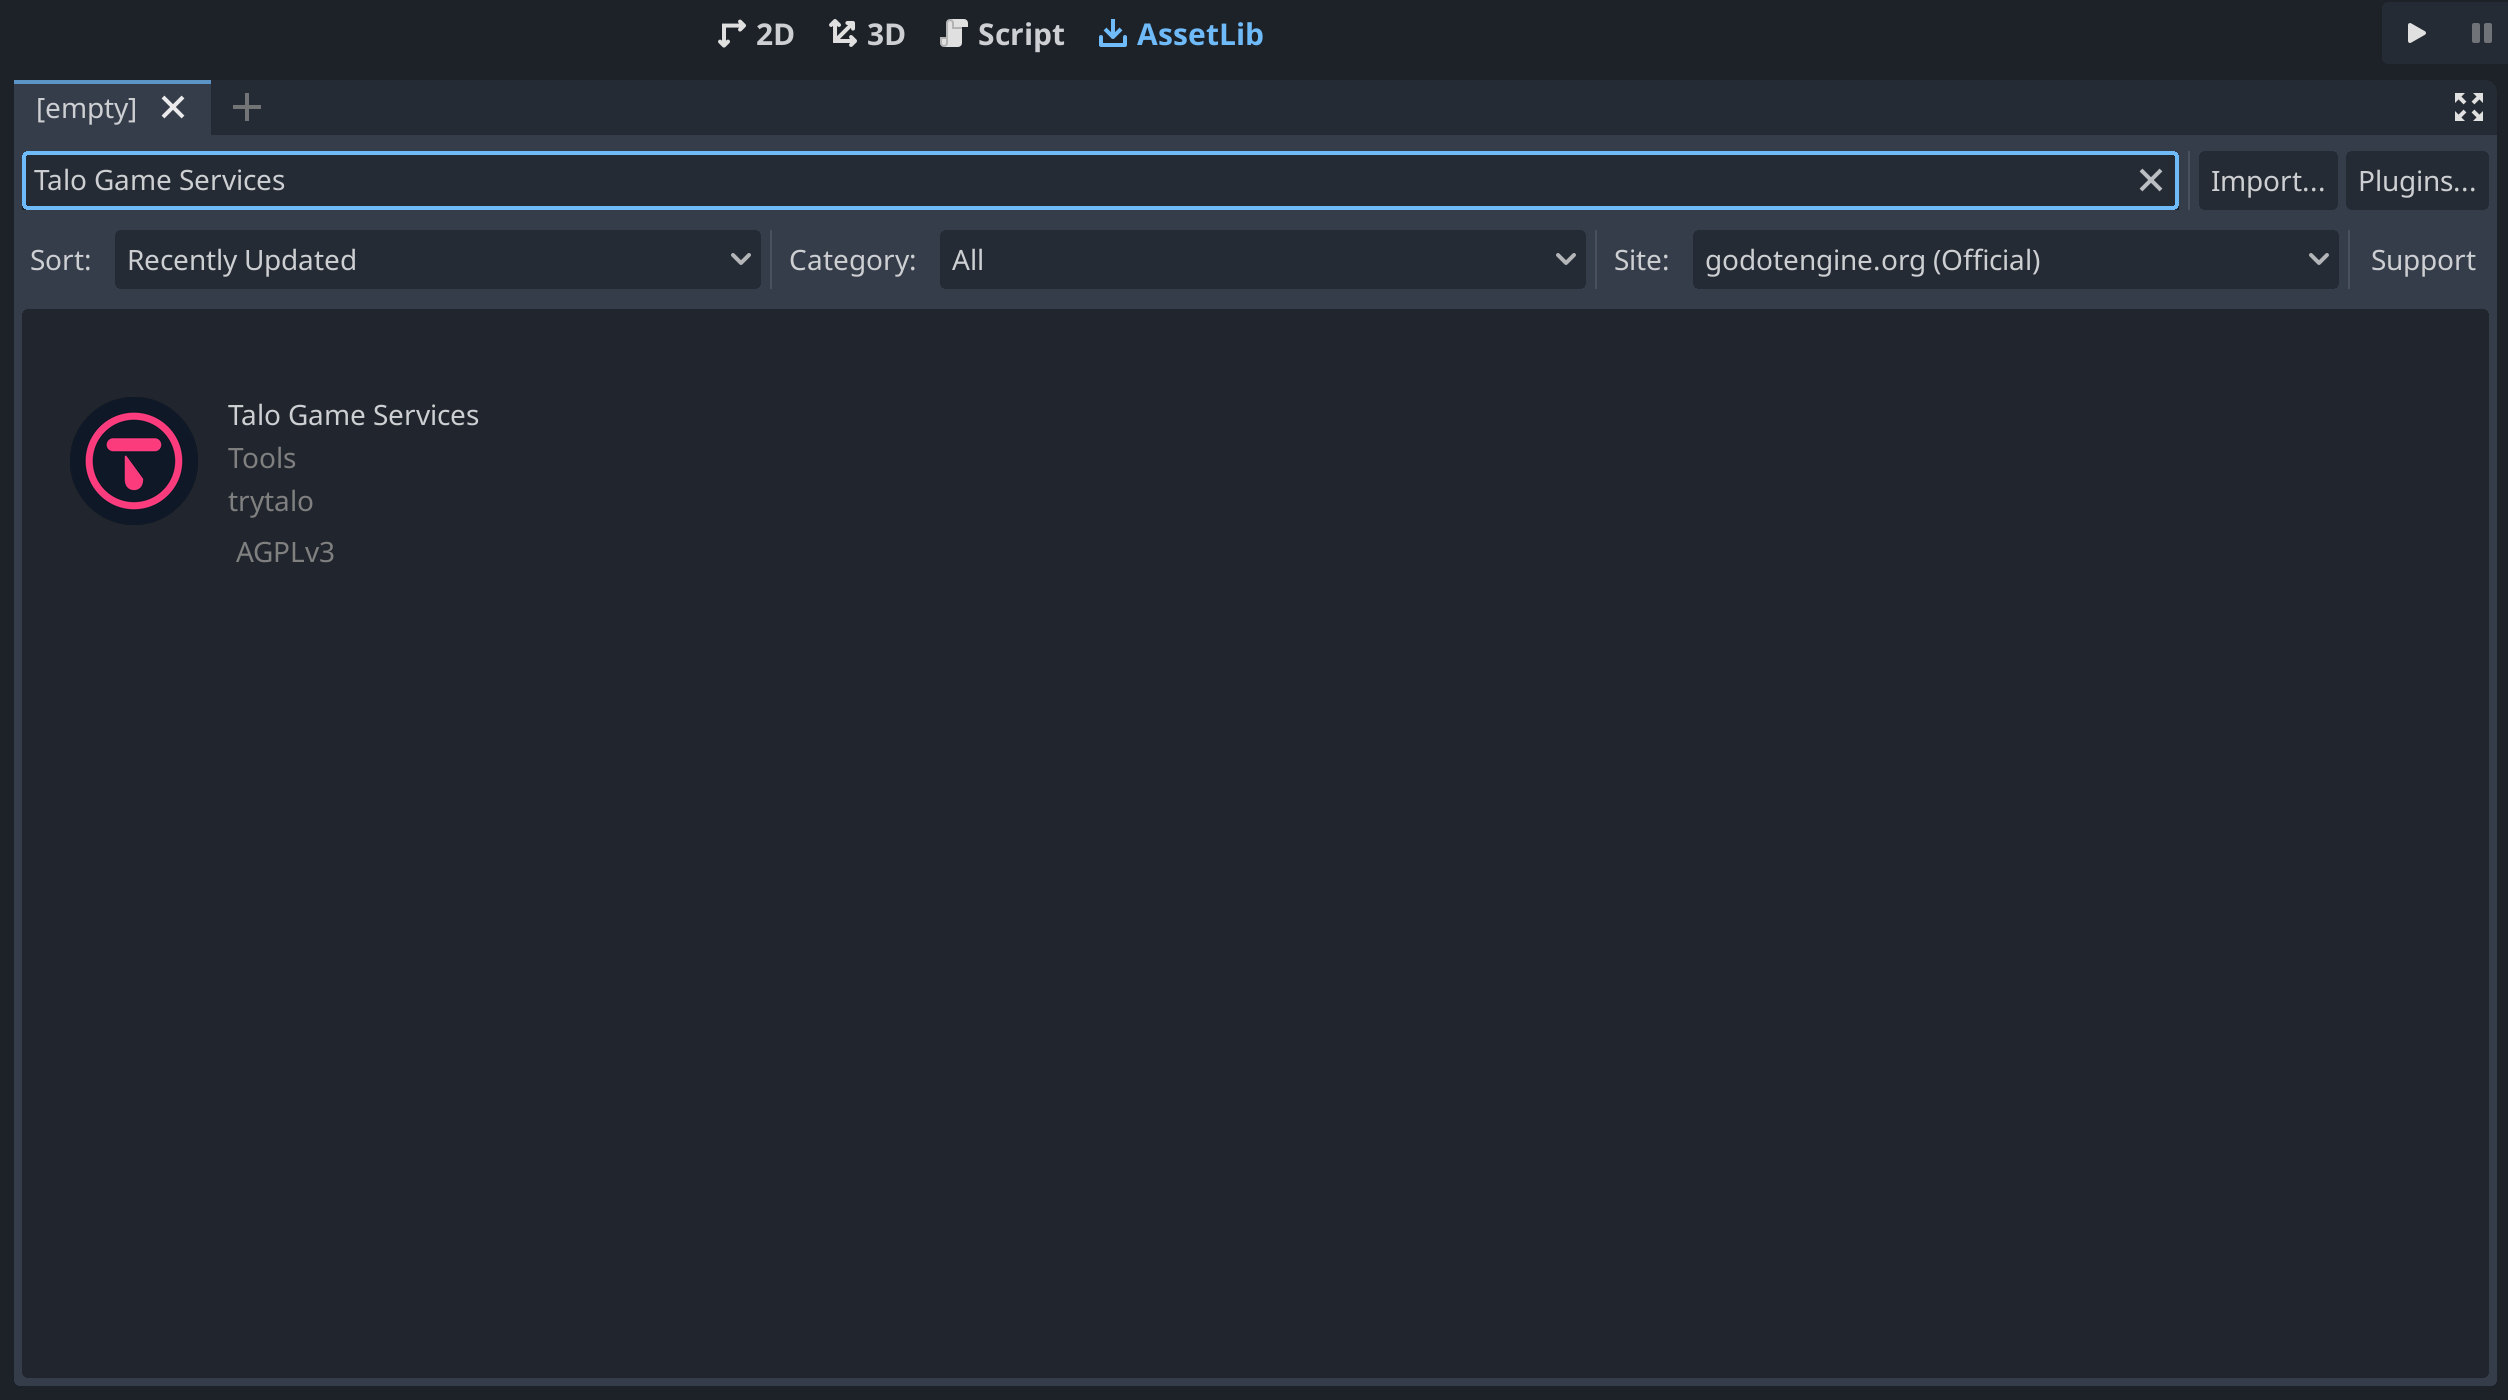
Before we start building our leaderboards, we need to set up the Talo Godot plugin. You can do this by downloading the plugin from the Godot Asset Library (or by searching "Talo Game Services" in the AssetLib tab of the Godot editor). You can also find the latest version of the plugin on itch.io.
Once you've downloaded the plugin, import it (typically you want to install plugins under the addons folder) and enable it in the Project > Project Settings > Plugins window.
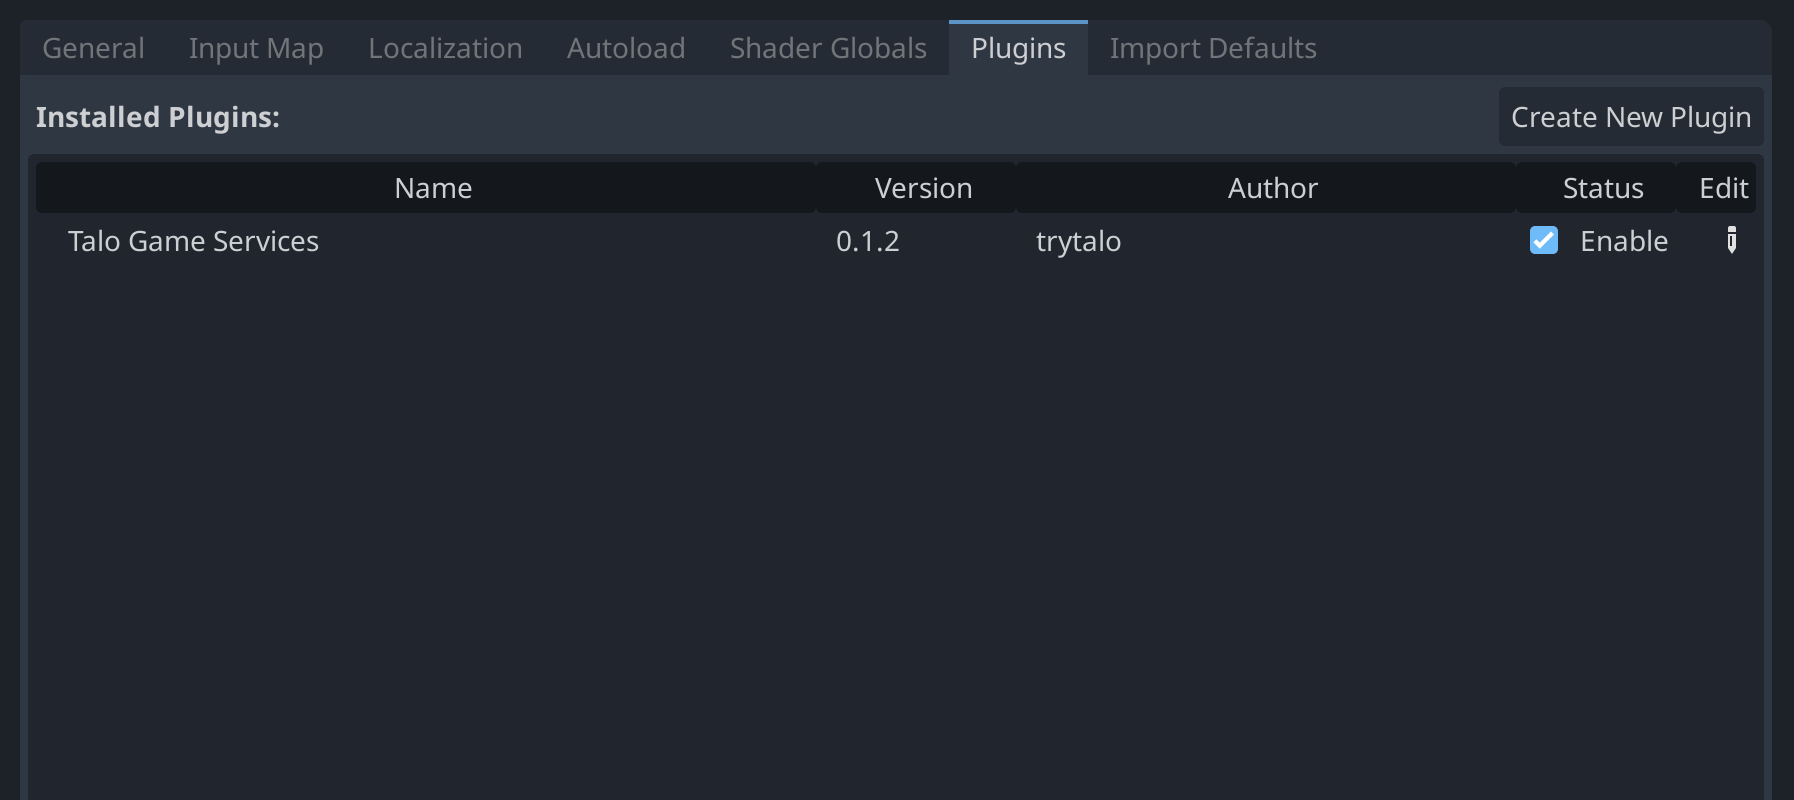
You can now run your game - this will create a settings.cfg asset inside the folder where you installed the plugin - we'll be using this later. To learn more about how to configure Talo, including how to configure your self-hosted version, check out the docs.
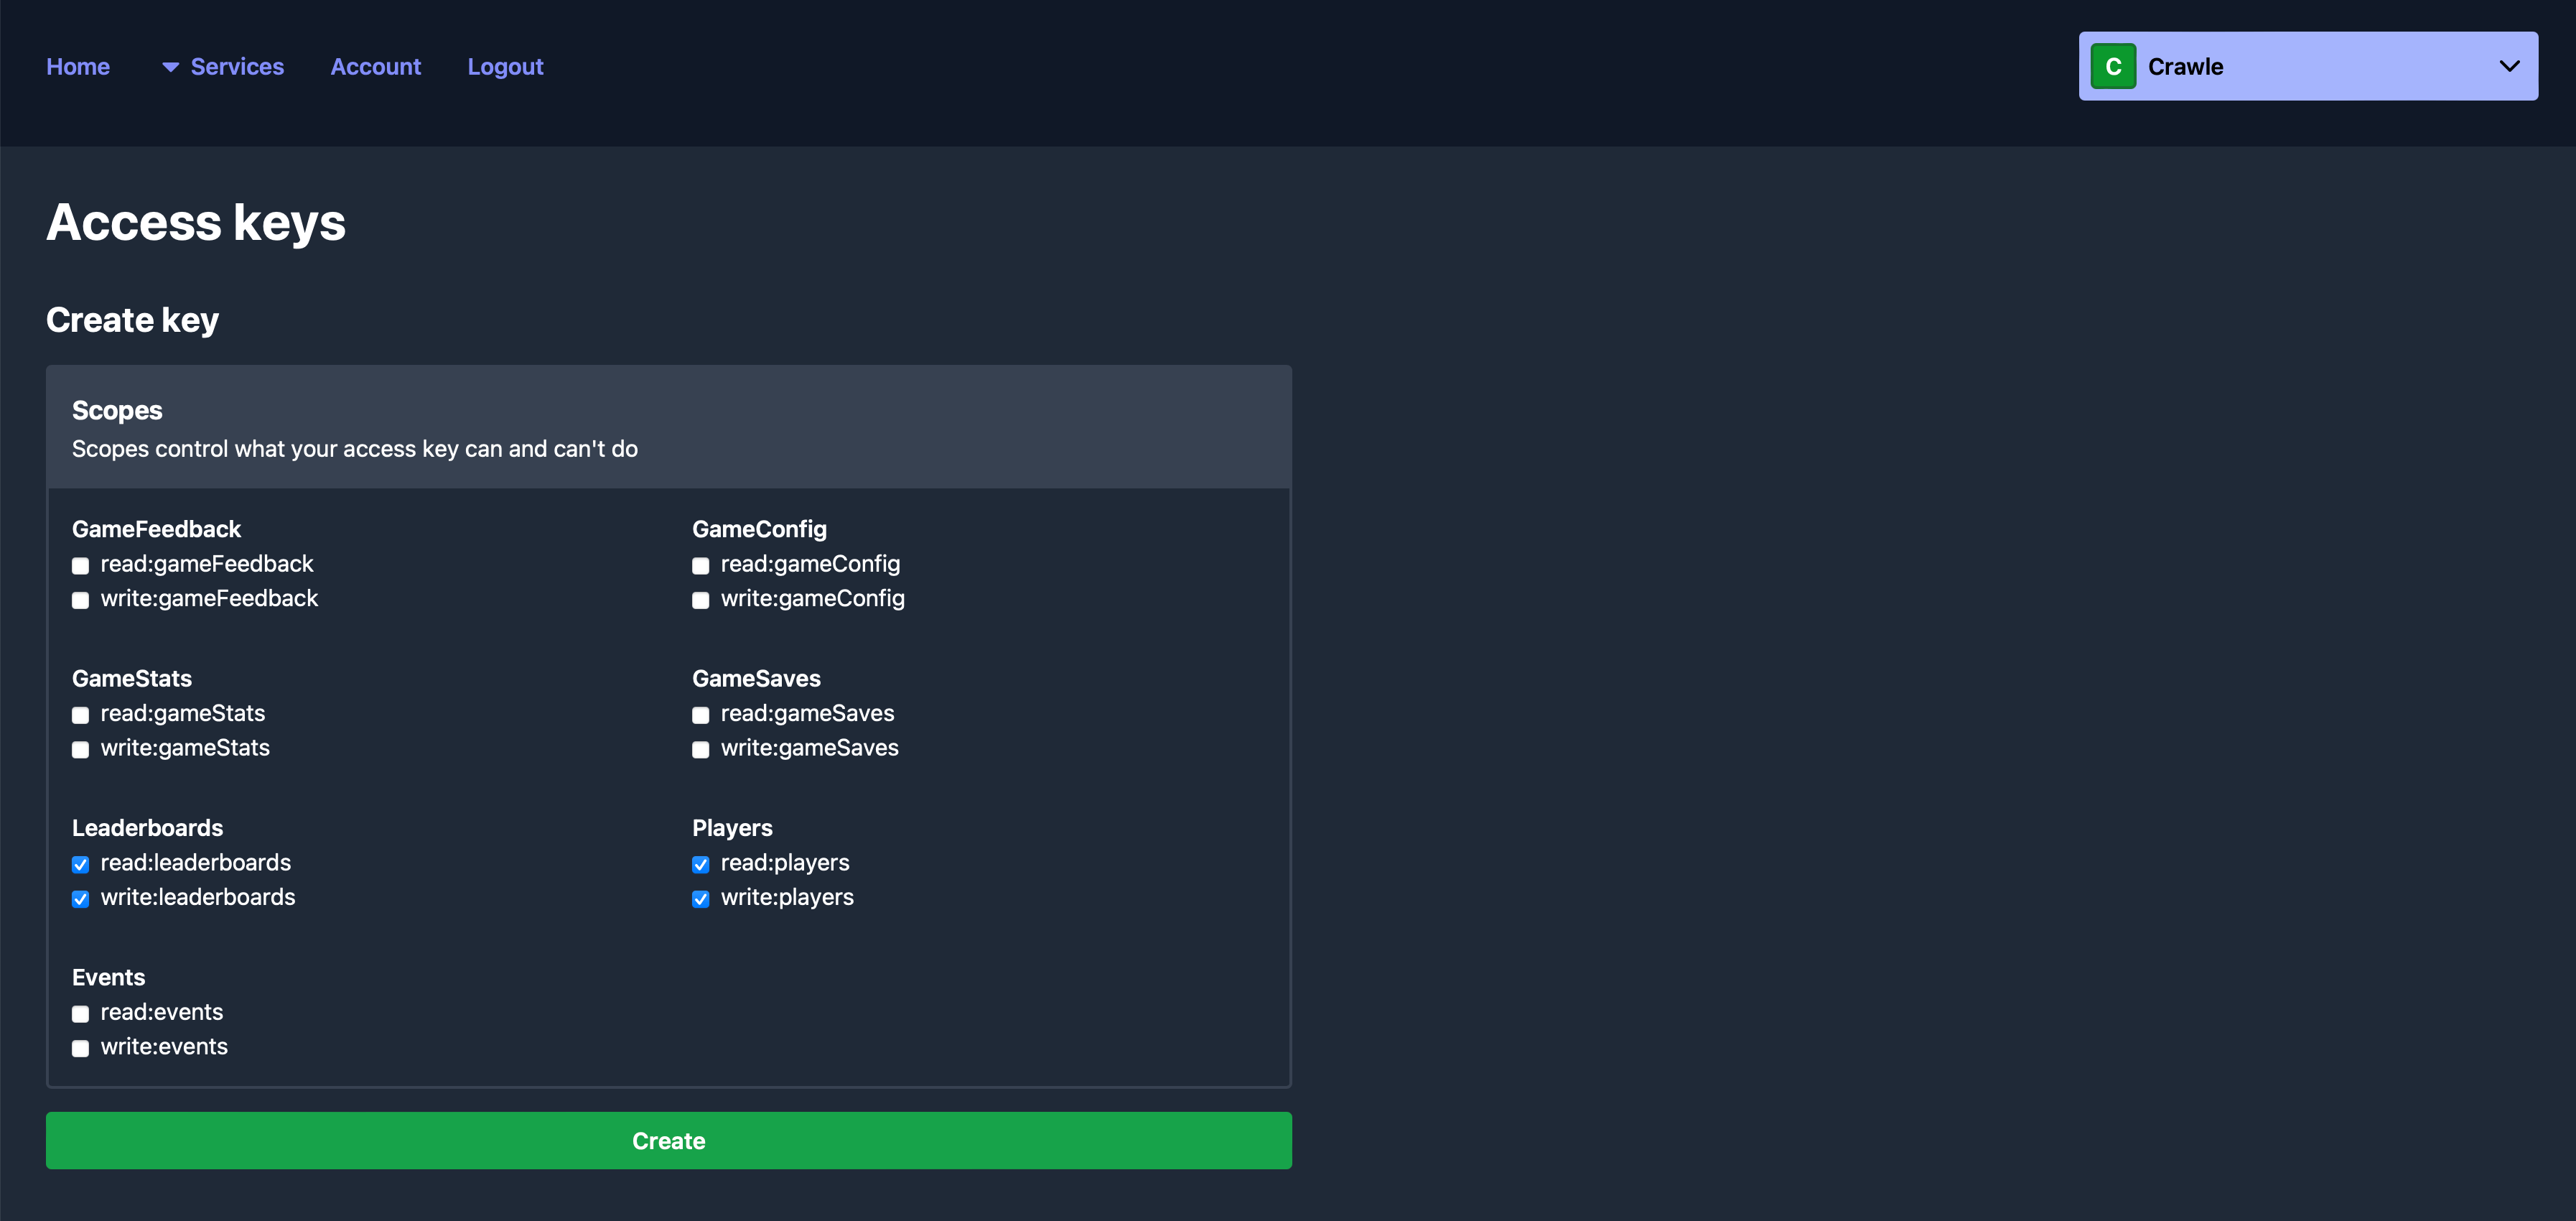
Generating an access key
Next we need to generate an access key for your game. Visit the Talo dashboard, login or create an account (and confirm your email address). Once logged in, create a new game (if you need to) and visit the Access Keys page.
Once there, choose the scopes available to your access key. For this tutorial, you'll need the read:players, write:players, read:leaderboards and write:leaderboards scopes. Create your access key and copy it into the access_key field of the settings.cfg.
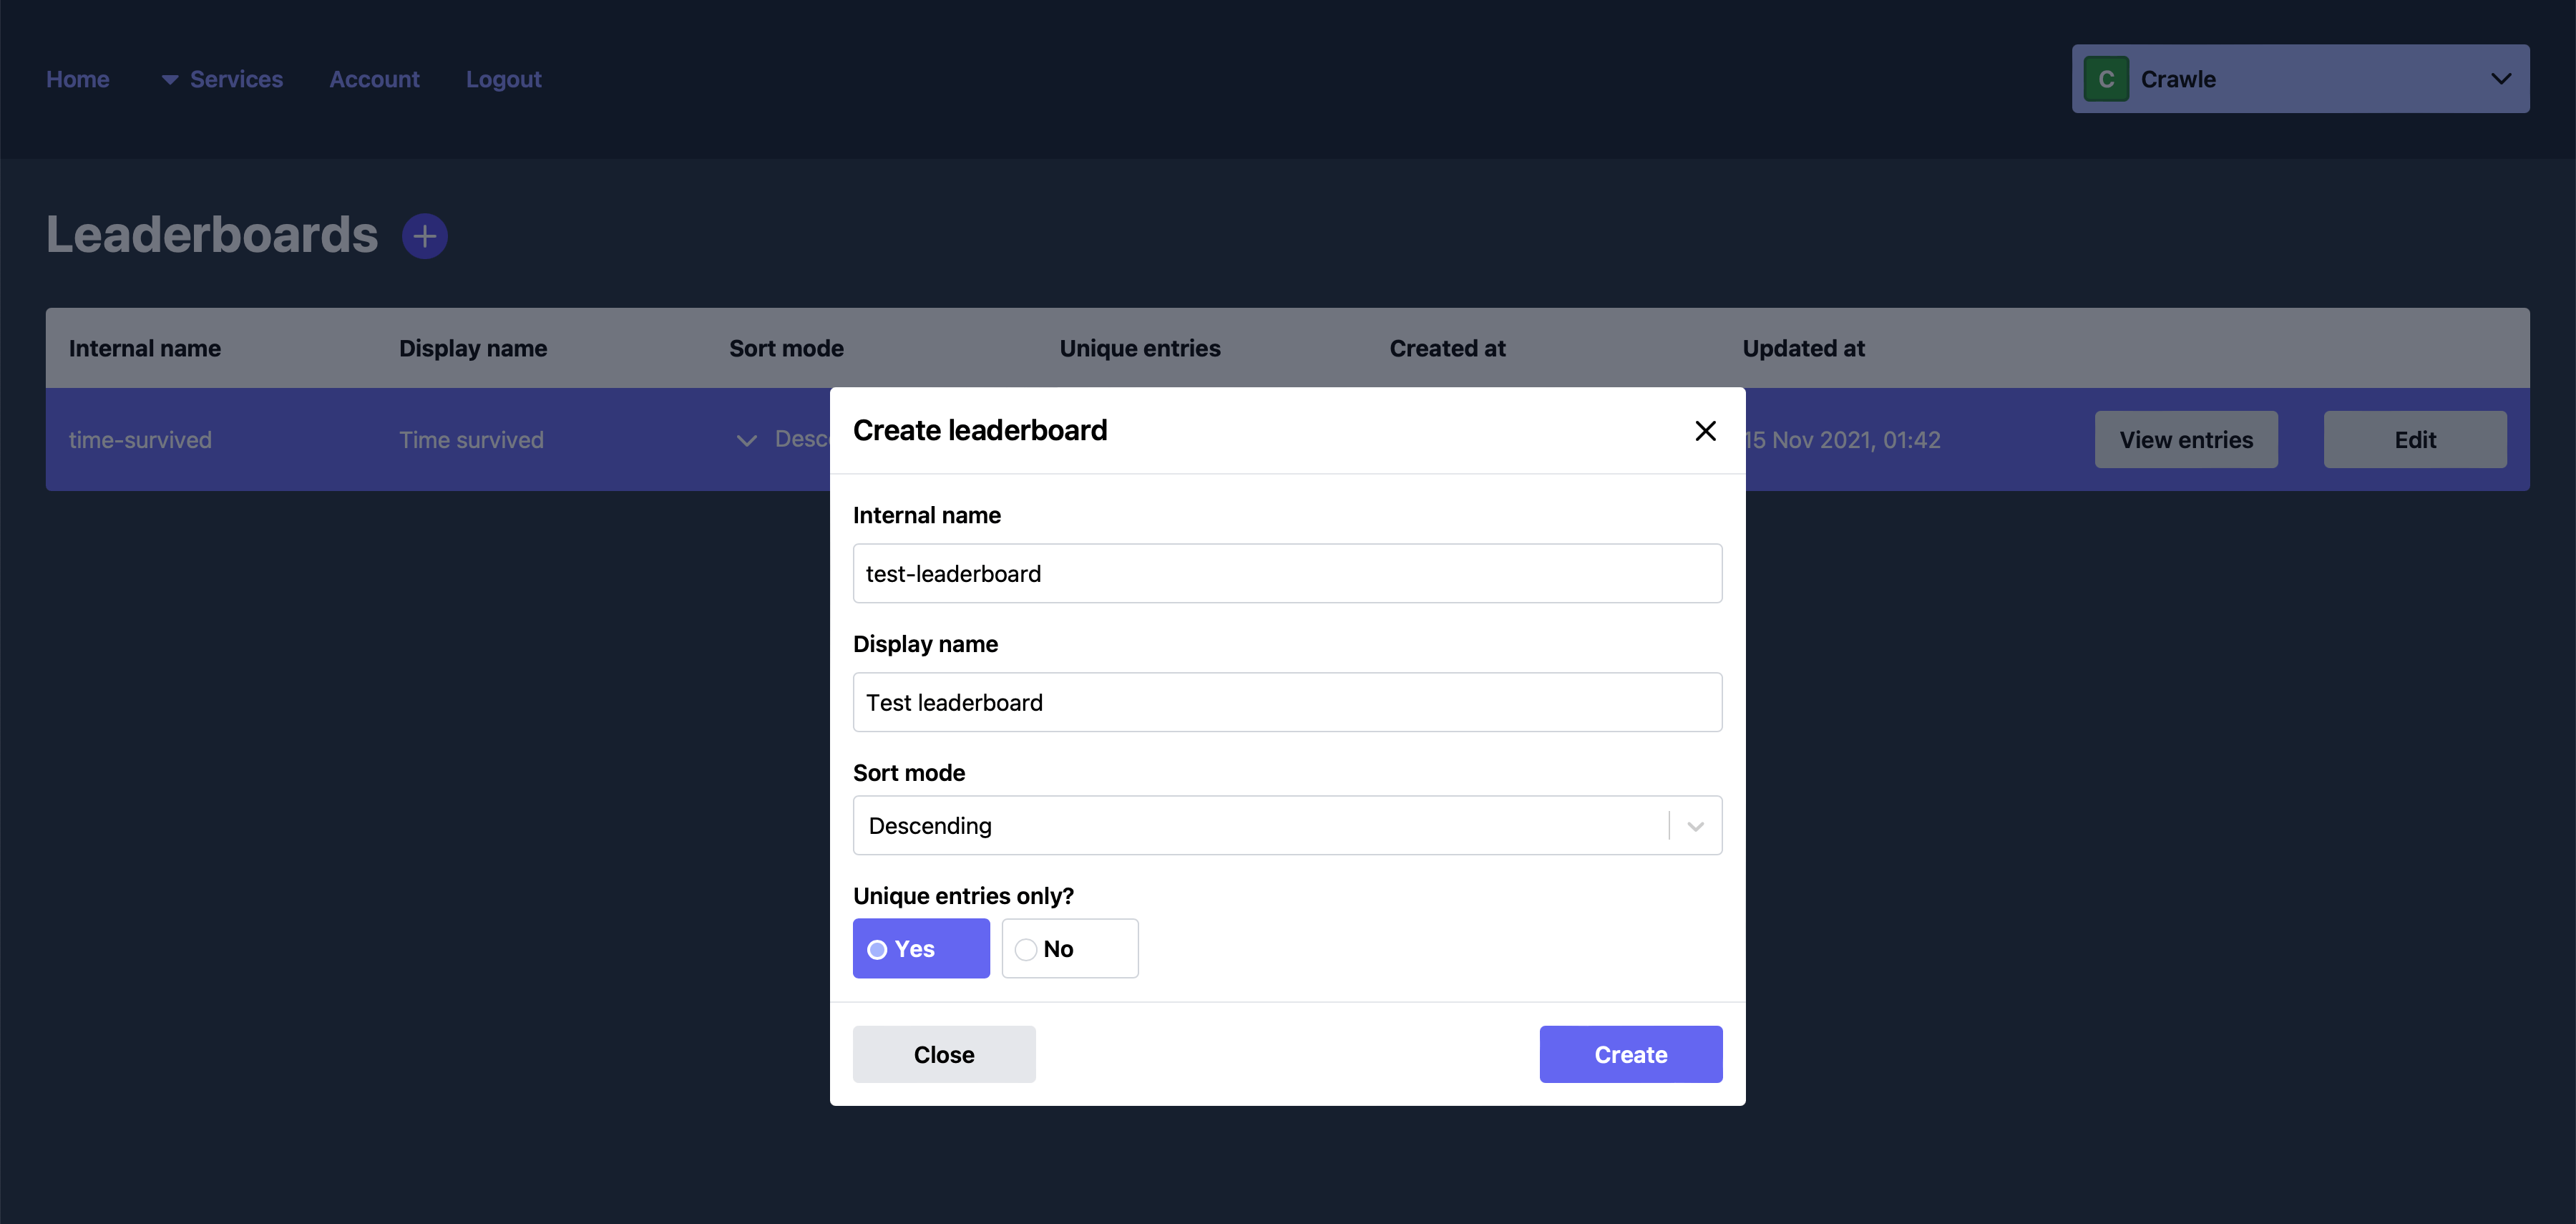
Creating a leaderboard
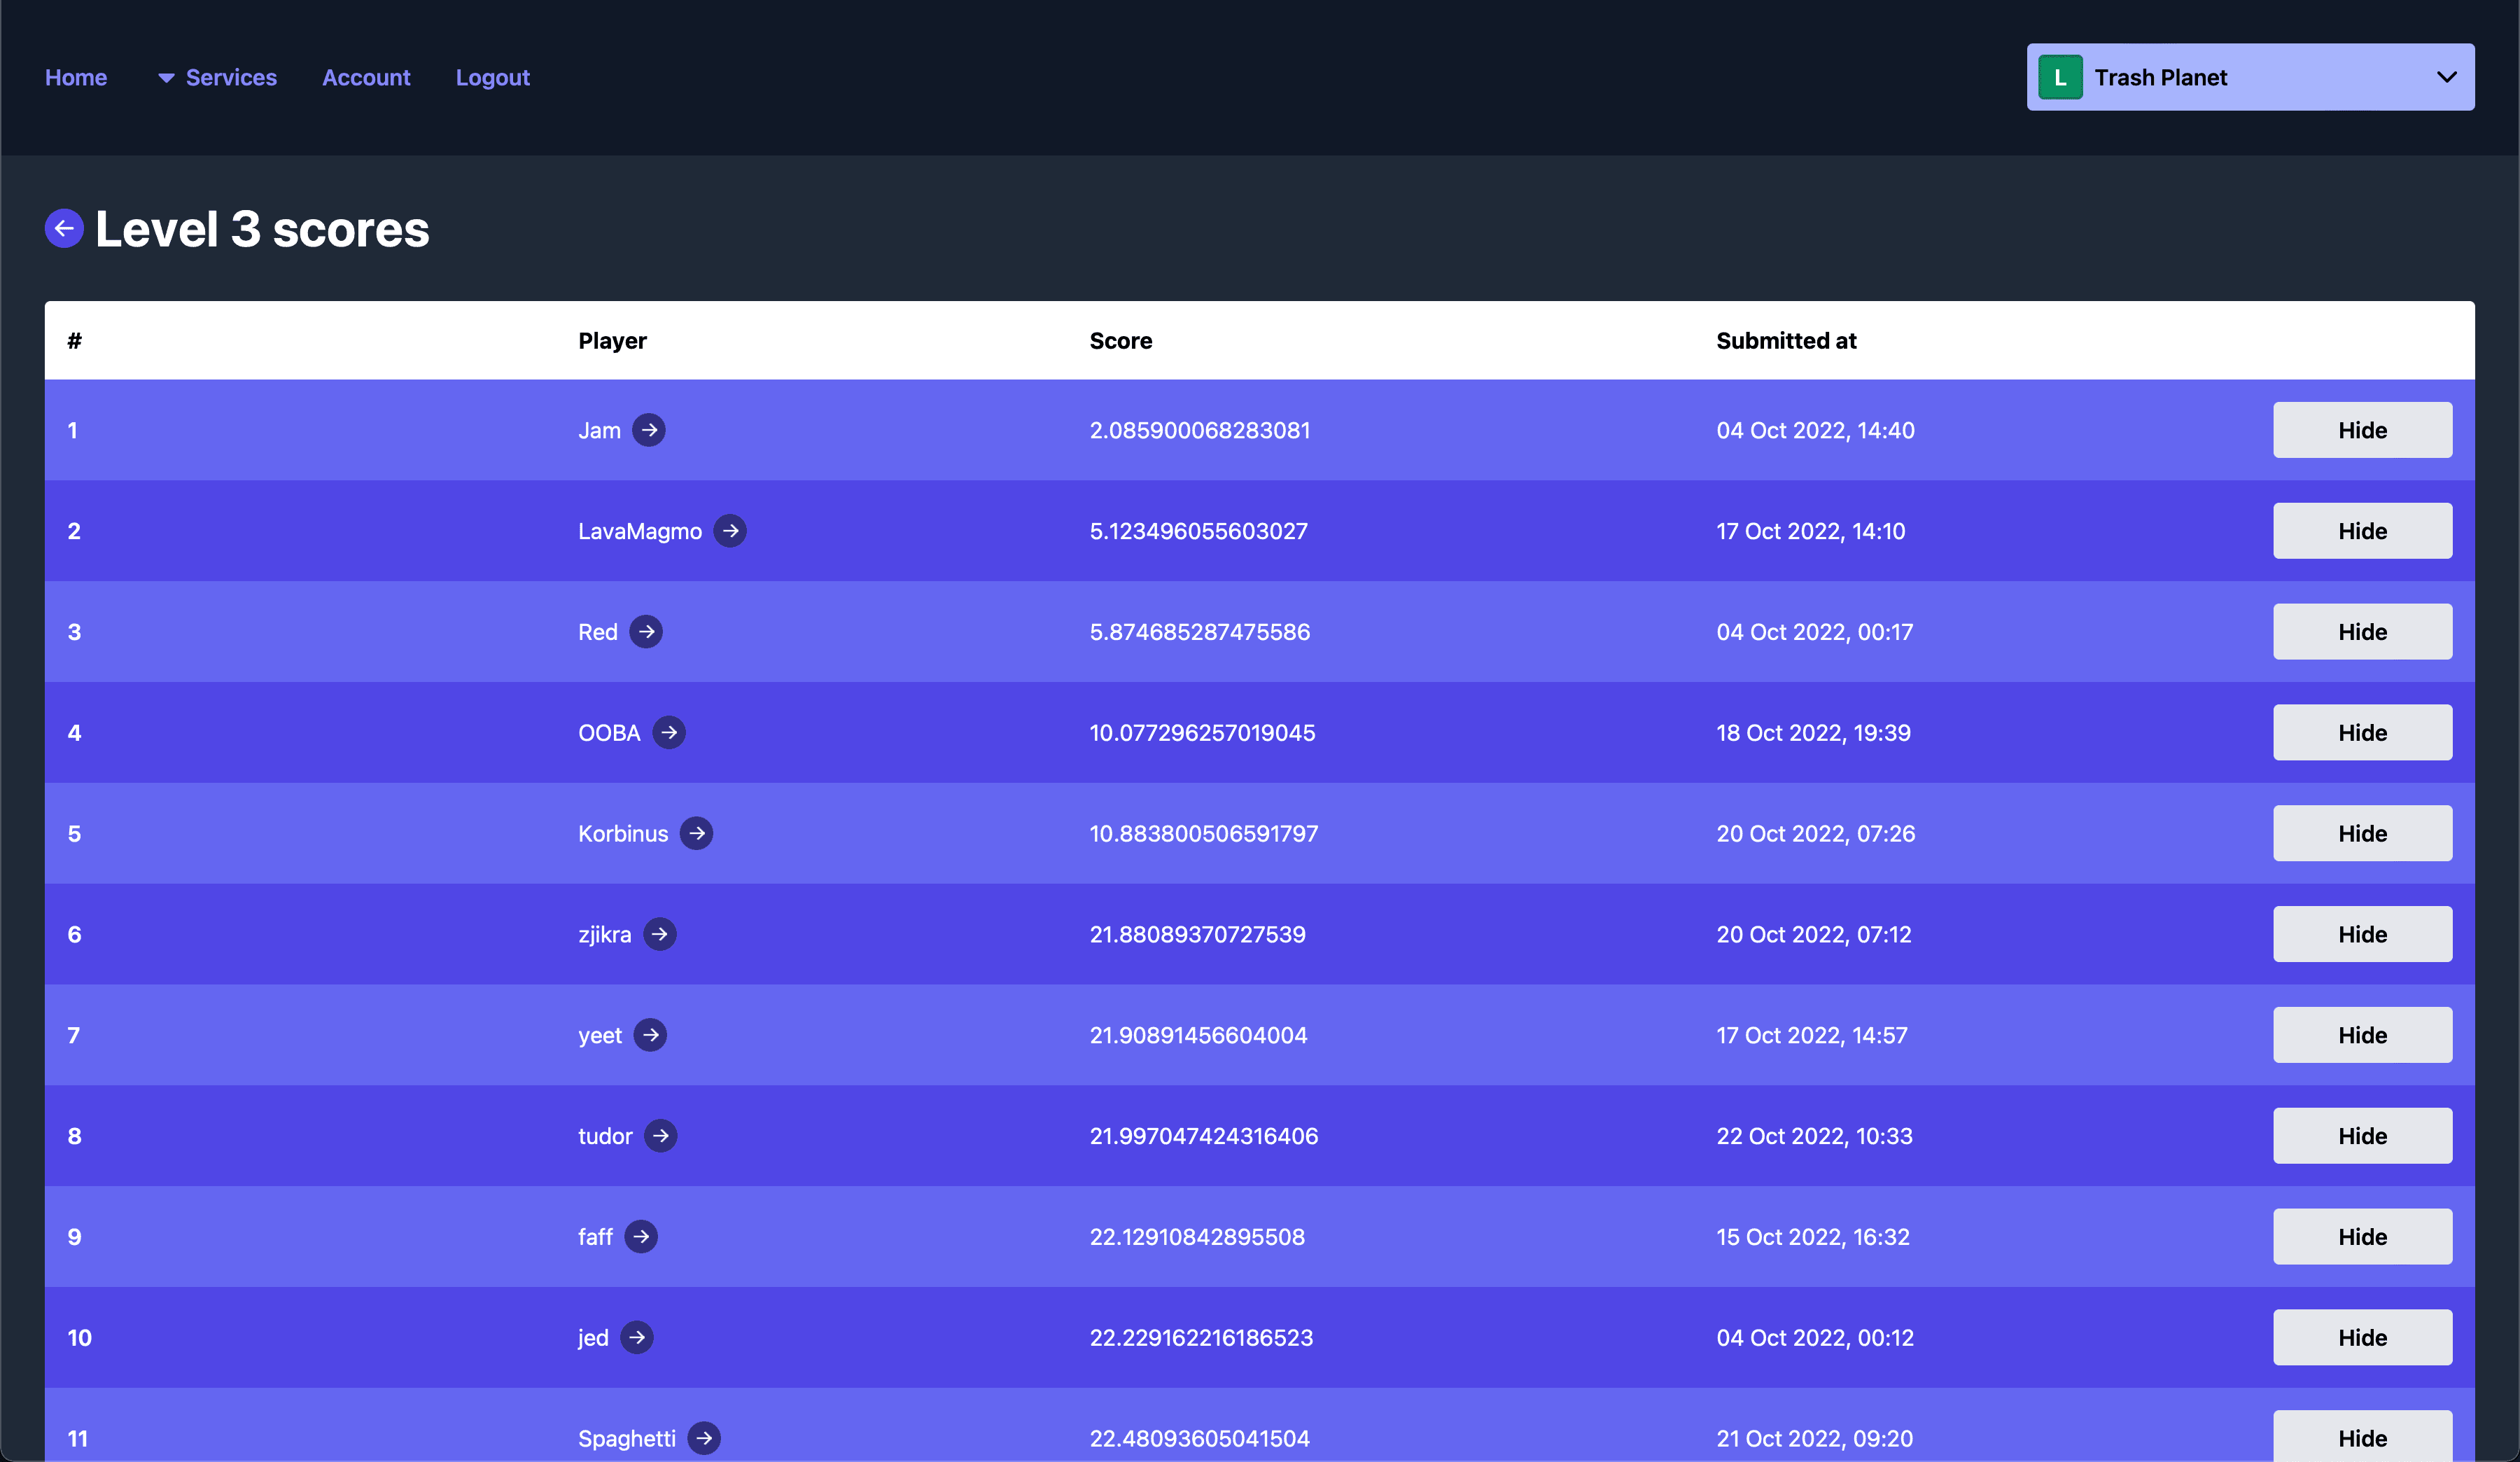
The last bit of setup we need to do involves actually creating our leaderboard. Visit the Leaderboards page in the dashboard. You can also access it from the Services dropdown. Configure your leaderboard however you like but keep note of your chosen Internal name since you'll need this to fetch entries.
Scene setup
We only need two scenes for this tutorial - the leaderboard entry scene and the leaderboard scene. The entry scene will display leaderboard entry data and the leaderboard scene will display all the leaderboard entries and allow us to submit new ones.
The leaderboard entry scene
We'll be using a simple scene with a single Label node to display entry data which includes the position, player identifier and score of a single entry.
Start off by creating a new scene where the root node is a Label. Next, update the text of the label to match the following:
{pos}. {username} scored: {score} pointsWe want to template out the text in the label using a script. Attach a new script to your root node with the following content:
extends Label

func _set_pos(pos: int) -> void:
  text = text.replace("{pos}", str(pos + 1))

func _set_username(username: String) -> void:
  text = text.replace("{username}", username)

func _set_score(score: int) -> void:
  text = text.replace("{score}", str(int(score)))

func set_data(pos: int, username: String, score: int) -> void:
  _set_pos(pos)
  _set_username(username)
  _set_score(score)
This script will allow us to set the position, username and score of the entry. When the label is fully populated we should see something like this:
1. Boz scored: 300 points
2. Baz scored: 200 points
3. Biz scored: 100 points
We'll call the set_data() function from the main leaderboard script.
The leaderboard scene
The leaderboard scene will be a bit more complex. We'll need a number of things to build out this simple leaderboard UI:
- A
ScrollContainerwith aVBoxContainerchild which will act as the parent node for our leaderboard entries. - A
TextEditnode which will allow us to input a new username. - A
Buttonnode which will allow us to submit a new entry to the leaderboard.
Some other optional nodes you might want to add include a Label node to display information about new leaderboard updates and a Label to display the name of the leaderboard. Here's the structure we're using:
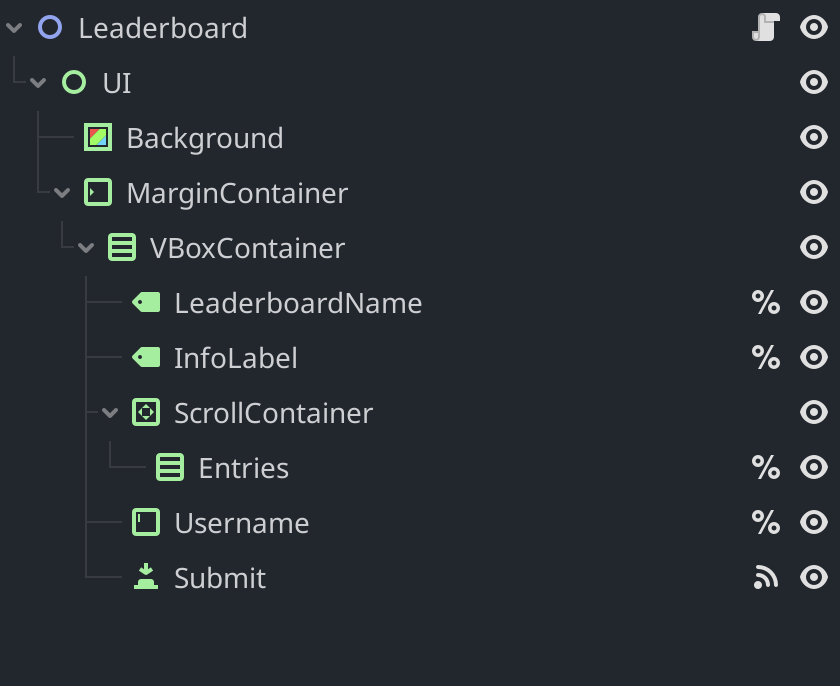
The % symbol here refers to a unique node name. You can do this by right-clicking the node and choosing the Access as Unique Name option. It's important to make the node names unique so we can easily reference them in our script.
We've also connected the on_pressed signal into a script attached to the Leaderboard root node.
The Talo Godot plugin comes with a leaderboards scene sample in the samples/leaderboards folder you can use as a basis for your own scene (this is what we're building!)
Fetching entries
Now that we have our scenes set up, we can start fetching entries from the leaderboard. We'll be using the Talo.leaderboards.get_entries() function to do this. This function takes a leaderboard_name and an options parameter. The leaderboard_name is the internal name of the leaderboard we created earlier and the options parameter allows us to specify pagination and filters. Requests are paginated to make sure we're not fetching too much data at once.
Here's the starting point for our leaderboard script:
extends Node2D

var entry_scene = preload("res://addons/talo/samples/leaderboards/entry.tscn") # update this to a path that matches your entry scene

@export var leaderboard_internal_name: String

@onready var entries_container: VBoxContainer = %Entries
@onready var username: TextEdit = %Username

func _ready() -> void:
  await _load_entries()

func _create_entry(entry: TaloLeaderboardEntry) -> void:
  var entry_instance = entry_scene.instantiate()
  entry_instance.set_data(entry.position, entry.player_alias.identifier, entry.score)
  entries_container.add_child(entry_instance)

func _build_entries() -> void:
  for child in entries_container.get_children():
    child.queue_free()

  for entry in Talo.leaderboards.get_cached_entries(leaderboard_internal_name):
    _create_entry(entry)

func _load_entries() -> void:
  var page = 0
  var done = false

  while !done:
  	var options := Talo.leaderboards.GetEntriesOptions.new()
	  options.page = page

    var res := await Talo.leaderboards.get_entries(leaderboard_internal_name, options)
    var entries: Array[TaloLeaderboardEntry] = res.entries
    var count: int = res.count
    var is_last_page: bool = res.is_last_page

    if is_last_page:
      done = true
    else:
      page += 1

  _build_entries()

func _on_submit_pressed() -> void:
  pass
Lets break this down piece by piece:
- We preload the entry scene so we can instantiate it later.
- We define an
exportvariableleaderboard_internal_namewhich we'll use to set the internal name of the leaderboard we want to fetch entries from. You will need to remember to set this in the Godot editor to theInternal nameof the leaderboard you created earlier in the dashboard. - We define two
onreadyvariables -entries_containerwhich is theVBoxContainerwe'll be adding our leaderboard entries to andusernamewhich is theTextEditnode we'll be using to identify players. - In the
_ready()function we call_load_entries()which will fetch entries from the leaderboard. - The
_create_entry()function instantiates a new entry scene and sets the data for the entry. _load_entries()and_build_entries()are used to fetch leaderboard entries and construct the UI respectively.
Diving deeper into the _load_entries() function we can see that it looks through Talo.leaderboards.get_entries() responses until it reaches the last page. get_entries() returns an object with the following:
- The entries
- The total number of entries available
- If we're on the last page
After we've fetched entries from the last page, the function calls _build_entries().
_build_entries() is what we use to keep our leaderboard UI up-to-date. It first clears the previous entries state and then loops through the cached entries (made up of every entry that Talo fetches for a specific leaderboard) and attaches a child entry scene for each one.
Submitting entries
You'll notice that we've left the _on_submit_pressed() function empty. This is where we'll be submitting new entries to the leaderboard. We'll be using the Talo.Leaderboards.add_entry() function to do this. This function takes the leaderboard_name and the score of the entry we want to submit.
Before we can submit an entry, we need to identify() our player. This allows us to tie an entry back to a specific player. We can do this by calling Talo.Players.identify() with the service and identifier of the player. The service is the identity service we're using (in this case username) and the identifier is the unique identifier of the player which we'll get from the username field:
func _on_submit_pressed() -> void:
  await Talo.players.identify("username", username.text)

  var score := RandomNumberGenerator.new().randi_range(0, 100)
  var res := await Talo.leaderboards.add_entry(leaderboard_internal_name, score)

  _build_entries()
In summary this function is doing the following:
- Identifying the player using the
usernamevalue. - Generating a random score between 0 and 100.
- Submitting the entry to the leaderboard.
- Rebuilding the entries UI.
The new entry is automatically added to the entries cache which means we don't need to fetch the leaderboard entries again and we can just call _build_entries() to update the UI with the latest dataset.
Testing it out
To verify that everything is working as expected, run your game and check the leaderboard scene. You should see the entries displayed in the order you selected when you created the leaderboard in the dashboard. You can also submit new entries and see them appear in the leaderboard. Here's the leaderboard we built:
We've added a few bells and whistles to ours. Remember, you can find this example in the Talo Godot plugin in the samples/leaderboards folder (along with the entry scene and all the scripts).
Wrapping up
In only a few minutes you can have a fully functioning leaderboard into your Godot game. We've covered how to set up the Talo Godot plugin, create a leaderboard in the Talo dashboard, fetch entries from the leaderboard and submit new entries. There's plenty more you can do from here such as adding pagination, filtering entries by player or even adding a leaderboard for each level in your game.
We're constantly improving Talo, including the leaderboards system which recently received an update to add the caching mechanism. If you have any feedback or want to receive updates on new features, come and join our Discord community or follow us on GitHub.
Build your game faster with Talo
Don't reinvent the wheel. Integrate leaderboards, stats, event tracking and more in minutes.
Using Talo, you can view and manage your players directly from the dashboard. It's free!
Get started
More from the Talo Blog

Changelog: Request verification, display names and event pie charts
A new request verification system secures every API and socket call, display names are now available on player aliases and event pie charts make analytics easier to scan.
Request verification is now available for Godot, Unity and the Talo API
Protect your game from replay attacks and request tampering with Talo request verification.
Changelog: Apple Game Center, profanity filters, prop errors
Apple Game Center is now supported and props can be filtered for profanity, alongside structured error codes and a new onboarding page.

Changelog: Google Play Games, player account migration and prop arrays
Google Play Games integration, player account migration, prop arrays, self-service account deletion and more. Here's what shipped in March 2026.